TOP TEN RICHEST MEN ONLINE 2011

1. Larry page

2. Sergey Brin

3. Jeff Bezos

5. Masayoshi Son

6. Mark Zuckerberg

7. Eric Schmidt

8. Mark Cuban

9. Jerry  Yang

10. Omid Kordestani


Age: - 48
Source: -Google! Inc
Qualification: - B.s in Electrical Engineer and MBA
Worth: - $1.9 billion

Do not be confused by his surname . He is not from Kurdistan. He is an ethnic Persian. He was Google’s Senior Vice president.
“Short on information” 


What do you think?

Please let us know if you know anything interesting about these Top Ten great people. Any interesting story will be cheered. If I made any mistakes in estimating the ranking based on my personal research, then kindly forgive me.  The purpose of this post is to keep you updated with the Big Daddies of Online Media in order to get a soft inspiration. I hope you liked it! :)

To read about the top Ten Websites of the year 2011 then kindly read the article below:

  • [a href="http://www.mybloggertricks.com/2011/05/alexas-top-ten-websites-2011.html" target="_blank"]Top Ten Websites in 2011[/a]
 stock_people Fahad Uddin


About the Guest Author:

Fahad is a energetic young guy, pursuing his degree in Mechanical Engineering. He has an ambition to play his part in Mechanical Industry. He is loves public speaking and enjoys sharing his random ideas with people around. During leisure time he enjoys writing on tech related stuff.

Source: http://www.mybloggertricks.com/2011/06/top-ten-richest-men-online-2011.html

10 Ways To Style and Create "Read More" Links In Blogger

   5.   And paste your selected [a href="#readmore"]Read More Link style code[/a] just above it.

   6.   Next search for this,

<data:post.body/>

   7.    Just below it you will find the read more link code similar to this one,

<b:if cond='data:blog.pageType != "item"'>
<a expr:href='data:post.url'>

<div style="text-align: right;">Read More ->></div></a>
</b:if>


If you are using a read more link button then the code will look something like this,

<b:if cond='data:blog.pageType != "item"'>
<a expr:href='data:post.url'>

<div style="text-align: right;">< img src=http://xyz.com border="0"/></div></a>
</b:if>

In both the cases, simply replace the highlighted code with this,


class="MBT-readmore"

    8.   Save your template and you are done!

Ten "Read More" Link Styles

Now select one of [a name="readmore"]these styles[/a] for step#5

Style#1:

Read More Button


/*-------------------------- Narrow black Orange-------------*/
.MBT-readmore{
background:#fff;
text-align:right;
cursor:pointer;
color:#EB7F17;
margin:5px 0;
border-left:400px dashed #474747;
border-right:2px solid #474747;
border-top:2px solid #474747;
border-bottom:2px solid #474747;
padding:2px;
-moz-border-radius:6px;
-webkit-border-radius:6px;
font:bold 11px sans-serif;
}
.MBT-readmore:hover{
background:#EB7F17;
color:#fff;
border-left:400px dashed #474747;
border-right:2px solid #EB7F17;
border-top:2px solid #EB7F17;
border-bottom:2px solid #EB7F17;
}
.MBT-readmore a {
color:#fff;
text-decoration:none;
}

.MBT-readmore a:hover {
color:#fff;
text-decoration:none;
}

Style#2:

Read More Button


/*------------Light Purple long----------------------*/
.MBT-readmore{
background:#fff;
text-align:right;
cursor:pointer;
color:#6882C7;
margin:5px 0;
border-left:400px solid #6882C7;
border-right:2px solid #6882C7;
border-top:2px solid #6882C7;
border-bottom:2px solid #6882C7;
padding:1px 5px 1px 1px;
-moz-border-radius:6px;
-webkit-border-radius:6px;
font:bold 11px sans-serif;
}
.MBT-readmore:hover{
color:#000800;
border-left:50px solid #6882C7;
border-right:2px solid #6882C7;
border-top:2px solid #6882C7;
border-bottom:2px solid #6882C7;
}
.MBT-readmore a {
color:#fff;
text-decoration:none;
}

.MBT-readmore a:hover {
color:#fff;
text-decoration:none;
}

Style#3:

Read More Button


/*---------------- Rectangle left border-----------*/
.MBT-readmore{
background:#fff;
text-align:right;
cursor:pointer;
color:#009999;
margin:5px 0;
float:right;

border-right:2px solid #009999;
border-left:10px solid #009999;
border-bottom:2px solid #009999;
border-top:2px solid #009999;

padding:5px;
font:bold 11px sans-serif;
}
.MBT-readmore:hover{
background:#fff;
font:bold 11px sans-serif;
color:#006B6B;

border-right:2px dotted #009999;
border-left:10px solid #006B6B;
border-bottom:2px dotted #009999;
border-top:2px dotted #009999;
}

.MBT-readmore a {
color:#fff;
text-decoration:none;
}

.MBT-readmore a:hover {
color:#fff;
text-decoration:none;
}

Style#4:

Read More Button


/*-------------- Pink Left right -----------*/
.MBT-readmore{
background:#fff;
text-align:right;
cursor:pointer;
color:#FE80DF;
margin:5px 0;
float:right;
border-right:2px solid #FE80DF;
border-left:2px solid #FE80DF;
padding:5px;
-moz-border-radius:6px;
-webkit-border-radius:6px;
font:bold 11px sans-serif;
}
.MBT-readmore:hover{
background:#fff;
font:bold 11px sans-serif;
color:#CC0099;
border-right:2px solid #CC0099;
border-left:2px solid #CC0099;
}
.MBT-readmore a {
color:#fff;
text-decoration:none;
}

.MBT-readmore a:hover {
color:#fff;
text-decoration:none;
}

Style#5:

Read More Button


/*------------- Brown top Bottom----------*/
.MBT-readmore{
background:#fff;
text-align:right;
cursor:pointer;
color:#B26B00;
margin:5px 0;
float:right;
border-top:2px solid #ddd;
border-bottom:2px solid #ddd;
padding:5px;
-moz-border-radius:6px;
-webkit-border-radius:6px;
font:bold 11px sans-serif;
}
.MBT-readmore:hover{
background:#fff;
font:bold 11px sans-serif;
color:#B26B00;
border-top:2px solid #B26B00;
border-bottom:2px solid #B26B00;
}
.MBT-readmore a {
color:#fff;
text-decoration:none;
}

.MBT-readmore a:hover {
color:#fff;
text-decoration:none;
}

Style#6:

Read More Link


/*-------------- Blue Blank-----------------*/

.MBT-readmore{
background:#0080ff;
text-align:right;
cursor:pointer;
color:#Fff;
margin:5px 0;
float:right;
border:2px solid #ddd;
padding:5px;
-moz-border-radius:6px;
-webkit-border-radius:6px;
font:bold 11px sans-serif;
}
.MBT-readmore:hover{
background:#FFf;
font:bold 11px sans-serif;
color:#0080ff;
border:3px dotted #ddd;
}
.MBT-readmore a {
color:#fff;
text-decoration:none;
}

.MBT-readmore a:hover {
color:#fff;
text-decoration:none;
}

Style#7:

Read More Link

/*------------- Red + Dark Red------------*/

.MBT-readmore{
background:#fffff;
text-align:right;
cursor:pointer;
color:#FE8080;
margin:5px 0;
float:right;
border:2px solid #FE8080;
padding:5px;
-moz-border-radius:6px;
-webkit-border-radius:6px;
font:bold 11px sans-serif;
}
.MBT-readmore:hover{
background:#FFf;
font:bold 12px sans-serif;
color:#FF0000;
border:2px solid #FF0000;
}
.MBT-readmore a {
color:#fff;
text-decoration:none;
}

.MBT-readmore a:hover {
color:#fff;
text-decoration:none;
}

Style#8:

Read More Link


/*------------ White + Green -----------*/

.MBT-readmore{
background:#fffff;
text-align:right;
cursor:pointer;
color:#008000;
margin:5px 0;
float:right;
border:2px solid #ddd;
padding:5px;
-moz-border-radius:6px;
-webkit-border-radius:6px;
font:bold 11px sans-serif;
}
.MBT-readmore:hover{
background:#008000;
font:bold 11px sans-serif;
color:#fff;
border:2px solid #ddd;
}
.MBT-readmore a {
color:#fff;
text-decoration:none;
}

.MBT-readmore a:hover {
color:#fff;
text-decoration:none;
}

Style#9:

Read More Link


/*---------- Black --------------*/
.MBT-readmore{
background:#000800;
text-align:right;
cursor:pointer;
color:#fff;
margin:5px 0;
float:right;
border:2px solid #ddd;
padding:5px;
-moz-border-radius:6px;
-webkit-border-radius:6px;
font:bold 11px sans-serif;
}
.MBT-readmore:hover{
background:#fff;
font:bold 11px sans-serif;
color:#000800;
border:2px solid #000800;
}
.MBT-readmore a {
color:#fff;
text-decoration:none;
}

.MBT-readmore a:hover {
color:#fff;
text-decoration:none;
}

Style#10:

Read More Link


/*----------Orange One 1 ----------------*/

.MBT-readmore{
background:#EB7F17;
text-align:right;
cursor:pointer;
color:#fff;
margin:5px 0;
float:right;
border:none;
padding:5px;
-moz-border-radius:6px;
-webkit-border-radius:6px;
font:bold 11px sans-serif;
}
.MBT-readmore:hover{
background:#FFB93C;
}
.MBT-readmore a {
color:#fff;
text-decoration:none;
}

.MBT-readmore a:hover {
color:#fff;
text-decoration:none;
}


Customization:

You can easily make changes to the colors and style by understanding this general guide.

  • Edit .MBT-readmore To Change background, border and font colors in Active mode
  • Edit .MBT-readmore:hover To Change background, border and font colors when a user hovers mouse cursor on the button
  • Edit .MBT-readmore a To change the link color 
  • Edit .MBT-readmore a:hover To change the link color on mouse hover

You can use the [a href="http://www.mybloggertricks.com/2008/01/color-code-generator-and-color-wheel.html" target="_blank"]Color Generator Tool[/a] For changing colors.

I hope you like it and if you faced any problems then don't feel shy to ask a brother. :>

Source: http://www.mybloggertricks.com/2011/06/10-ways-to-style-and-create-more-links.html

Remove Read More Link or Jump Break Link Provided by Blogger

    5.   and just below it find and delete this code,

<b:if cond='data:post.hasJumpLink'>
<div class='jump-link'>
<a expr:href='data:post.url + "#more"'><data:post.jumpText/></a>
</div>
</b:if >

     6.   Save your template and you are done


Add a Custom Read More Link

Now to add a custom read more link which can be fully customized in various looks please follow this tutorial,

  • How To Show only [a href="http://www.mybloggertricks.com/2009/05/add-read-more-link-to-your-posts-expand.html"]Post Summary[/a] in Blogger?

Now after having added the link, it would be even more interesting by changing its look by reading this tutorial,

  • [a href="http://www.mybloggertricks.com/2011/06/10-ways-to-style-and-create-more-links.html" target="_blank"]Customize Read More Links[/a]
Source: http://www.mybloggertricks.com/2011/06/remove-read-more-link-or-jump-break.html

How To Remove or Delete Labels In Blogger?

remove-labelsAdd tags or labels to your posts is an important SEO step for letting spiders to better understand the content and categories of your blog. Due to unfriendly user interface of the Edit Posts section of blogger dashboard, most people find it difficult to remove, apply and add new labels to the posts. I was going to write a post on it but I have found an easy video tutorial created by Blogger team themselves. I am sure you will enjoy understanding todays tutorial via this video.

[a name='more'][/a]

Remove and Delete Labels From Blogger blogs


If you want to hide labels on a particular post then kindly read this post:

  • [a href="http://www.mybloggertricks.com/2011/06/hide-label-tags-and-author-name-in.html" target="_blank"]Hide Labels[/a], author name and date and time on a post
Source: http://www.mybloggertricks.com/2011/06/how-to-remove-or-delete-labels-in.html

Top 10 Featured Google Friend Connect Gadgets

Ratings and Reviews:

Interest Poll:

Recommendation:

Featured Content:

Newsletter Subscription:

Top Ten Members:

Event:

Let us know:

  Hassam Ahmad Awan


About the Guest Author:

Hassam is a young A Level Student who loves to learn and share tech related stuff. He has an ambition to become a Software Engineer. He is a passionate blog author and publishes regular tutorials to newbie bloggers at [a href="http://bloggingehow.blogspot.com" target="_blank"]BLoggingeHow[/a].

You can always keep in touch with him at [a href="http://www.facebook.com/pages/BLoggingeHow/126203964129170" target="_blank"]@Facebook[/a]

Source: http://www.mybloggertricks.com/2011/06/10-featured-google-friend-connect.html

Facebook Like and Send Button In 108 Languages

<div id="fb-root"></div><script src="http://connect.facebook.net/en_US/all.js#xfbml=1"></script><fb:like href="" send="true" layout="button_count" width="450" show_faces="false" font=""></fb:like>

The only part of the code that you will need to change is the language code en_US . Replace it with your local language code may that be Spanish, Urdu, Hindi, Turkish, French, Japanese, Chinese, Korean, Arabic or Romanian.

If you are using the Iframe version then you need to include a locale parameter with the proper country code in the src URL. For Example,

src="http://www.facebook.com/plugins/like.php?locale=en_US&..."

Again you need to replace en_US with the local code. 

PS: To accommodate different languages you will also need to change the width of the button.

Local language codes For Facebook:

    1. Catalan
      ca_ES
    2. Czech
      cs_CZ
    3. Welsh
      cy_GB
    4. Danish
      da_DK
    5. German
      de_DE
    6. Basque
      eu_ES
    7. English (Pirate)
      en_PI
    8. English (Upside Down)
      en_UD
    9. Cherokee
      ck_US
    10. English (US)
      en_US
    11. Spanish
      es_LA
    12. Spanish (Chile)
      es_CL
    13. Spanish (Colombia)
      es_CO
    14. Spanish (Spain)
      es_ES
    15. Spanish (Mexico)
      es_MX
    16. Spanish (Venezuela)
      es_VE
    17. Finnish (test)
      fb_FI
    18. Finnish
      fi_FI
    19. French (France)
      fr_FR
    20. Galician
      gl_ES
    21. Hungarian
      hu_HU
    22. Italian
      it_IT
    23. Japanese
      ja_JP
    24. Korean
      ko_KR
    25. Norwegian (bokmal)
      nb_NO
    26. Norwegian (nynorsk)
      nn_NO
    27. Dutch
      nl_NL
    28. Polish
      pl_PL
    29. Portuguese (Brazil)
      pt_BR
    30. Portuguese (Portugal)
      pt_PT
    31. Romanian
      ro_RO
    32. Russian
      ru_RU
    33. Slovak
      sk_SK
    34. Slovenian
      sl_SI
    35. Swedish
      sv_SE
    36. Thai
      th_TH
    37. Turkish
      tr_TR
    38. Kurdish
      ku_TR
    39. Simplified Chinese (China)
      zh_CN
    40. Traditional Chinese (Hong Kong)
      zh_HK
    41. Traditional Chinese (Taiwan)
      zh_TW
    42. Leet Speak
      fb_LT
    43. Afrikaans
      af_ZA
    44. Albanian
      sq_AL
    45. Armenian
      hy_AM
    46. Azeri
      az_AZ
    47. Belarusian
      be_BY
    48. Bengali
      bn_IN
    49. Bosnian
      bs_BA
    50. Bulgarian
      bg_BG
    51. Croatian
      hr_HR
    52. Dutch (België)
      nl_BE
    53. English (UK)
      en_GB
    54. Esperanto
      eo_EO
    55. Estonian
      et_EE
    56. Faroese
      fo_FO
    57. French (Canada)
      fr_CA
    58. Georgian
      ka_GE
    59. Greek
      el_GR
    60. Gujarati
      gu_IN
    61. Hindi
      hi_IN
    62. Icelandic
      is_IS
    63. Indonesian
      id_ID
    64. Irish
      ga_IE
    65. Javanese
      jv_ID
    66. Kannada
      kn_IN
    67. Kazakh
      kk_KZ
    68. Latin
      la_VA
    69. Latvian
      lv_LV
    70. Limburgish
      li_NL
    71. Lithuanian
      lt_LT
    72. Macedonian
      mk_MK
    73. Malagasy
      mg_MG
    74. Malay
      ms_MY
    75. Maltese
      mt_MT
    76. Marathi
      mr_IN
    77. Mongolian
      mn_MN
    78. Nepali
      ne_NP
    79. Punjabi
      pa_IN
    80. Romansh
      rm_CH
    81. Sanskrit
      sa_IN
    82. Serbian
      sr_RS
    83. Somali
      so_SO
    84. Swahili
      sw_KE
    85. Filipino
      tl_PH
    86. Tamil
      ta_IN
    87. Tatar
      tt_RU
    88. Telugu
      te_IN
    89. Malayalam
      ml_IN
    90. Ukrainian
      uk_UA
    91. Uzbek
      uz_UZ
    92. Vietnamese
      vi_VN
    93. Xhosa
      xh_ZA
    94. Zulu
      zu_ZA
    95. Khmer
      km_KH
    96. Tajik
      tg_TJ
    97. Arabic
      ar_AR
    98. Hebrew
      he_IL
    99. Urdu
      ur_PK
    100. Persian
      fa_IR
    101. Syriac
      sy_SY
    102. Yiddish
      yi_DE
    103. Guaraní
      gn_PY
    104. Quechua
      qu_PE
    105. Aymara
      ay_BO
    106. Northern Sámi
      se_NO
    107. Pashto
      ps_AF
    108. Klingon
      tl_ST
Source: http://www.mybloggertricks.com/2011/06/facebook-like-and-send-button-in-108.html

Lost AdSense Account? How To Get it Back?

Sometimes it is not your fault. Your competitors attack your site with auto clicks using a software out of jealousy without you knowing. For example look what happened to [a href="http://www.google.com/support/forum/p/AdSense/thread?tid=268e1c8984791538&hl=en" target="_blank"]this woman[/a] and also read the nice answer given in the thread by StevenG.

Personally speaking it really hurts when you receive such an email. It can shatter your Online Income dreams in a second and leave you hopeless but should you cry all day and night for being banned and begging Google to accept you back? Of course not! There are tons of solutions for your problem because you are not alone. I have shared two different solutions for young web owners and firmly established web owners.

Solution to New Bloggers or Web owners:

Who is a new blogger or  web owner?

  1. Your Blog or website is just one year old
  2. Your Blog has a PR less than 2
  3. Your Alexa Rank is > 100,000
  4. You receive 100-300 visitors daily
  5. Total number of your posts are less than 60-50

If you fit into this category and you lost your account then you don't have to worry because you honestly have lost nothing! Without 1000-10,000 daily visitors, Adsense or any other Ad service is meaning less. It will take 5-6 months for you to make just $50-100 if you fit in the above category. So what should be the best solution for you?

You still can make your dream come true and earn a happy living online by taking these steps:

  1. Make a new Gmail Account with different First and Second Name and Personal Info.
  2. Setup a New blogger account with the new Gmail ID
  3. Delete your Old Blog and Import your old posts to this new one by making serious Editing. Do not republish those posts with the same titles and starting paragraph and blogger images. Shuffle the paragraphs. The best idea is to rewrite them in different words. I know this will take long but you can do that within a week if your posts are no more than 50.
  4. If your blogger account and Gmail ID is not very old and crowded then the best is to delete both of them and make a new fresh start. Don't worry this step is smart long term one, it will hurt you at first but you will be in a much better state later.
  5. If you want to keep your blogger account and Gmail ID then its better to set up a blog with upgraded Wordpress and not the free one.
  6. Do not Link to your old blog after you have set up the new one.

How am I so sure of these steps? My own home buddy lost his Adsense Account. He receives 16000 daily visitors by sharing security threat articles. He set up a blog on wordPress and now he is receiving 2000-3000 visitors on the new blog with $2-4 per day, which is not a bad startup.  If you are a regular MBT reader then you know well who I am pointing to. Hope you give this solution a good thought with a cool mind.

Solution To Well established Web Owners

The only reason why you may have lost your account could be tons of clicks made on your Ads by your competitors. Unfortunately we still live in a world of anger, envy and jealousy. You still have a hope and can do much better if you give preference to alternatives. Adsense is gone and its not precious than the hours of sweat and tears you shed in bringing your website to a bigger stage. The biggest source of your income lies in your Traffic and this is what advertisers run after. Below are 10 best alternatives to Adsense that you can try to expect a more satisfying flow of Ad Income:

  1. [a href="http://chitika.com/publishers.php?refid=mustafastc" target="_blank"]Chitika[/a]
  2. [a href="http://adbrite.com" target="_blank"]AdBrite[/a]
  3. [a href="http://infolinks.com" target="_blank"]Infolinks[/a]
  4. [a href="http://www.Bidvertiser.com" target="_blank"]Bidvertiser[/a]
  5. [a href="http://www.PocketCents.com" target="_blank"]Pocket Cents[/a]
  6. [a href="http://www.Kontera.com"]Kontera[/a]
  7. [a href="http://www.Clicksor.com" target="_blank"]Clicksor[/a]
  8. [a href="http://www.ExitJunction.com" target="_blank"]Exit Junction[/a]
  9. [a href="http://www.DynamicOxygen.com" target="_blank"]Dynamic Oxygen[/a]
  10. [a href="http://www.AdBull.com" target="_blank"]AdBull[/a]


So What have you Decided?

Taking a step is always better then not making any move. Let me know what you think of the solutions shared above. If you have any stories or solutions then you are most welcome to share it with us. I wish this post may help you to achieve what you still can. There are always alternatives and solutions, what matters more is how you take a positive action. Peace and blessings be upon you all.


This post was requested by Karan Chauhan From [a href="http://www.krackoworld.com" target="_blank"]krackoworld[/a]

Source: http://www.mybloggertricks.com/2011/06/lost-adsense-account-how-to-get-it-back.html

Anyone Can Earn Online and Be a Blogger, Just Go For it! Part-2

Now coming to the final thing that directly attaches my reason of this topic with your needs that what should be the topic for the blog? I agree that its one of the most difficult task to think on which topic you may write but the answer is always in front of you, you just need to think over it.

imagesFirst of all you must think about your area of interest, that where your all interest lies? What do you feel about something? Can you write it as a topic, if yes than that should be the topic! If not, then you can Google the topic and write it as your own, it often happens when you have a lot of knowledge and you don’t know how to gather and filter it into this form. Just take an example of pencil that is not sharp at the moment, although the graphite lead is present inside it, but it’s useless at the moment, but when it is sharped then it can do a number of jobs. Just like this you just have to enrich your this quality and write for your own skills.

This is my personal experience that there is a time when topic suddenly come into your mind and when you start thinking you get more and more things about it, if you don’t have your keyboard there, you must write it somewhere so that when you get time you can write it as your post, and just like this when you will write the next topic will automatically come into your mind and the process goes on and on. The thing is,

You just need the inertia! :)

So go for it, give your thoughts full swing and give your paintings of imaginations the remarkable colors. Let the life be filled with happiness. Keep going :) Best of Luck!

  Asjad Azeem


About the Guest Author:

Asjad is an Undergraduate Student, pursuing his B.E Degree in Computer and Information System Engineering. He loves to write and share his ideas during leisure time. Apart from techy stuff, he also enjoys writing Fiction. He takes programming as his favourite subject. You can always contact him at [a rel="nofollow" href="mailto:asjad.azeem@yahoo.com"]YAHOO![/a]

Source: http://www.mybloggertricks.com/2011/06/anyone-can-earn-online-and-be-blogger_21.html

Related Posts Widget For Blogger - Optimized Version

  3.   Keep the width to three stories i.e three thumbnails if your post width is less than 500px

  4.   Hit the Get Widget button and then click the Install Widget link on the next page as shown below,

related posts linkwithin

  5.   Change the Title to Related Posts: or anything you may like as shown below,

related posts widget

  6.  Now Click the Edit Template Link

related posts widget

  7.   Replace the code that you see with this one:

<b:includable id='main'><b:if cond='data:blog.pageType == &quot;item&quot;'><data:content/></b:if></b:includable>

The above code will hide the thumbnails from appearing on homepage.

  8.   Next click the Edit Content Link and add the following additional code just above the code inside the widget,

<script>linkwithin_text='Related Posts:'</script>

Replace Related Posts:  with any text you want.

   9.  Finally hit the ADD WIDGET button.

  9.  Once you are taken to the Page Elements page of your blogger account, simply drag the widget to the bottom of your post body as shown below,

related posts

   10.  Click the "Save" orange button at the top-right corner and you are done!

Let me know if you needed any further help on this. I hope the slight customization may prove helpful to you. Peace.

Source: http://www.mybloggertricks.com/2011/06/related-posts-widget-for-blogger.html

Add "NoFollow" Tag to all Links in Table Of Contents


UPDATE: Please ignore this post and read this instead [a href="http://www.mybloggertricks.com/2011/08/never-tag-internal-links-with.html"]Never Tag internal links as No follow[/a]


nofollow-tagOne of the biggest mistakes that almost everyone does is not properly applying Google's webmaster guidelines while optimizing blogs. Almost on all blog hosting platforms, bloggers create a page where they add all the Post links so that the visitors may find it easy to navigate their site. It is a good thing but unknowingly you are risking yourselves into keyword spamming. In 2003 Google mentioned it clearly that a single page can contain no more than 100 links else the website will be penalized. That condition though is removed by Google but it is still recommended that the number of links on a single page should be kept as low as possible.  However if you still wish to add thousands of links on a single page for better site navigation then you must nofollow them. Confused? Follow up.


What are the Disadvantages?


Take an example of these two pages at our blog :


  • [a href="http://www.mybloggertricks.com/2008/03/blogger-tips-and-tricks.html" target="_blank"]Blogger Tricks[/a]


  • [a href="http://www.mybloggertricks.com/2008/01/blogger-widgets-and-plugins.html" target="_blank"]Blogger Widgets[/a]


You will find many links there but all these [a href="http://www.mybloggertricks.com/2010/01/how-to-inter-link-pages-smartly-to-flow.html" target="_blank"]internal links[/a] are tagged as nofollow. This is an important SEO strategy to keep you blog optimized. Google spiders give a lot of value to hyperlinks and some even say that whenever a robot sees a link it enters automatically into that page to index it. Suppose you have added too many internal links on a single page without the nofollow tag. When the robot indexes that page it will be confused with too many links pointing to different subpages of a common domain. As a result your page will become doubted. The robot will treat that page as one where you are trying to linkback all your pages into to distribute the PR. You won't suffer at first but when you continue adding more links, your search engine reputation will keep on dropping.


Most experienced bloggers have experienced a PR drop from Pagerank 5 to 4 and PR4 to PR3 or even PR6 to PR3 ( I have seen them myselves with all domain names in my mind but can't disclose them) This happens because as soon as you reach PR-4 or PR-5 the indexing and crawling criteria for your blog takes a more serious turn. Your pages will be more better crawled and indexed but with more a more serious eye from the robot.


What is a No Follow Tag?


In easiest terms it is a small HTML code that tells the search engine robots not to crawl the link. This tag locks the link and robots treat the link more like a text without caring where the link points. The linked will not be crawled but indexed. The Text will still be stored in Google databases. The Page to which the link points will get no PR benefits.


This tag looks like this,


rel="nofollow"


How To NoFollow All links In Table Of Contents Page?


A link looks like this,


<a href="htpp://xyz.com">LINK TEXT HERE</a>


To make the link nofollow just add the nofollow tag before href like this,


<a rel="nofollow" href="htpp://xyz.com">LINK TEXT HERE</a>


Do this for all your links and make your blogs and pages [a href="http://www.mybloggertricks.com/2011/03/best-seo-tools-to-optimize-your-blog.html" target="_blank"]better optimized[/a]. Hope this info proves helpful to most of you. Rest God knows best. Peace and blessings.


Source: http://www.mybloggertricks.com/2011/06/add-tag-to-all-links-in-table-of.html

9 Facebook Social Plugins For Blogs

facebook-social-pluginsFacebook social plugins are widely used online today. The most famous is the "like" button which is used by millions of webmasters to promote their sites. How many of these social plugins do you use on your blog? I'll try to provide brief information about these great tools that might help you to achieve your online endeavors.

[a name='more'][/a]


Activity Feed

[a href="https://blogger.googleusercontent.com/img/b/R29vZ2xl/AVvXsEi_-NOGvSIKfi1Y4SnZPghE2rjqq8qXzwPa7exTGm30Pr1bD6GP9Mvg4XnwQJLfH2xGzvKNzpx1lCQMpDJMkFOlCWY9BvYgirTaBSFHEZsvqp8MVFtD4c5roXt4eFGcX5uHMRxkqJy9NOA/s1600/facebook+social+plugins+1.png"]activity feed[/a]The activity plugin displays the most important activity going on at your blog. Whether somebody has liked a post, commented on the Facebook comment box or shared the post with their friends on Facebook. If a user is logged into Facebook, the plugin will be personalized to highlight content from their friends.
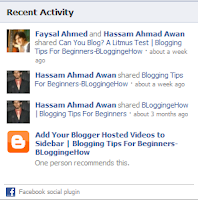
I would only recommend this plugin if you believe there is enough activity going on at your blog other wise it wont leave a good impression at the visitors.


Comments

[a href="https://blogger.googleusercontent.com/img/b/R29vZ2xl/AVvXsEhgFVTZQOtYCeRXbupejslFU3JS5Pcy7wRToFi5MbXjkHvvEB8isQbEI1DrEWYV99g5MzapxZ3d37i85BbUwHG3qNwXSMkCcsrkqB3SH58U7k8mg6A7UxQ501wBx-RE8Vz9OV4u1ZX0oCE/s1600/facebook+social+plugins+2.png"]comments box[/a]

Comments plugin lets users to comment on your blog. A great feature of this social plugin is that when ever someone comments on your blog and leaves the "Post to Facebook" check box ticked, the comment appears on his Facebook activity feed with a link back to your blog and thus making increasing more links towards your blog.

Also this comment box is extremely user friendly and is quite simple to understand. 

You can add it to your blogger blogs by reading this tutorial: [a href="http://www.mybloggertricks.com/2011/06/add-facebook-comments-box-to-blogger.html" target="_blank"]Facebook comments Box[/a]

Facepile

[a href="https://blogger.googleusercontent.com/img/b/R29vZ2xl/AVvXsEgSPuOLa9otln8xGDCKcLX4JCwzErZz6rS0_Oub4Z5lsWwF1KqCxTlMxBnOqddgBgxqYthLcrB4Y6EMGljUIaPPvMgEYZ61_utmSxNdl1BqFdTEbi1CWX8e2JcMxVRAX9aQ8Qi_njcHXTU/s1600/Module-Facepile-de-Facebook.png"]facepile[/a]
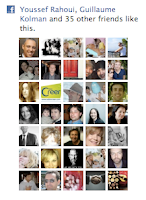
 

The Facepile plugin shows the profile pictures of all the people who have liked your blog or have signed up for it. You just need to enter your blog URL and your plugin would be ready to go. This again helps only if your blog have enough likes and followers.


Like Box

[a href="https://blogger.googleusercontent.com/img/b/R29vZ2xl/AVvXsEigYL2FytCjsfgFhHGo9moZP44XeHnOM0cxLeIGYIoPBgWl0UfhwvMQcAlUDzr38AQNAOalb7YlWS9uf5fWv16v-KqukdZ1cjP58aAzNu_lx6MSZ7KBqqjk6jgMIbld7Z5K39QYj7jz4Sk/s1600/facebook+social+plugins+3.png"]like box[/a] The Likebox plugin lets users to like your Facebook page from your website or blog. There is no need to visit the the page its self. Also, the box shows activity feed of your page at Facebook and makes it really easy for  the users to like your blog. Though there is a option to turn of the activity feeds and even the thumbnails. Its quite customizable.

You can add it to your blogger blogs by reading this tutorial: [a href="http://www.mybloggertricks.com/2011/06/add-facebook-like-box-at-bottom-of.html" target="_blank"]Facebook Like box[/a]


Like Button

[a href="https://blogger.googleusercontent.com/img/b/R29vZ2xl/AVvXsEh1OBRkaYY3O7OuU5Dt8Pgd9PZryCTO-1dMg-cxgMNAIZBXOHqnzeJcE6GMj_GcFkRDhQOKd9zU5kl9sXR76gfKECA2uDQG5bcTi3j5dkPbP-hUiBHucP8wQyWxGi4HSWPH00-K3YuMoSw/s1600/facebook+social+plugins+4.png"]like button[/a]

Like button works somewhat like the "like box" but have a different purpose to serve. Its a more handy button and can be added to places like post headers and footers. Its just allows to like your respective post or your blog as a whole. Today, Facebook likes have become one of the determinants of your online success. Its a must to have plugin.

You can add it to your blogger blogs by reading this tutorial: [a href="http://www.mybloggertricks.com/2011/05/add-facebook-like-and-send-button-to.html" target="_blank"]Like plus Send Button[/a]


Live Stream

[a href="https://blogger.googleusercontent.com/img/b/R29vZ2xl/AVvXsEgHYHIzoHRd65W4A3lPyomiCOoNl5XTRO2jY__4G1yIDXyN4Q3UdgxfiWK3vmY6MFCilJC4kiMS0sb-XYWuBMcVBMzKdvveMEuQZJy-xOGT2uSDxpMsr-fiPZI61d80K7YuDqKoGcw2PZE/s1600/facebook+social+plugins+5.png"]live stream[/a]
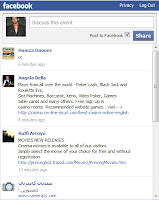
 

Live stream plugin lets users to share comments and activity in real time on your blog. Live Stream works best when you are running a real-time event, like live streaming video for concerts, speeches, or web chats.


Login Button

[a href="https://blogger.googleusercontent.com/img/b/R29vZ2xl/AVvXsEjV92seGidwg3IzPY7euad1NSK1bzmLuIO5ck08Ky7wtbPBhF3Xk97QUFN7FaNvd2TwOwULPLF72J30TCgjbI8dHPOKAPLpEGF_eJlwDG6w6n4XjFWIL6UyPVgGqdwKmJ04BatDWDoWGyc/s1600/facebook+social+plugins+6.png"]facebook log in[/a]The Facebook Login button lets users login in your blog as the name suggest and in addition to this the users can see his friends pictures who are already part of your blog. The button can be customized in a way that you can set the number of rows for the pictures to be displayed.


Recommendation

[a href="https://blogger.googleusercontent.com/img/b/R29vZ2xl/AVvXsEgM4DicYMe_z7KjdhjsitZpFKXxmcZidjNvBSPdBg5FToWk0td-7uJmmB0nDyHKQuliArAa3qoH4v5eyMRU69cJC7O_1BkXntFsWc2JgAd55KfJtz8HydyLl2j9kcdnt2P2aw7OJXewonY/s1600/facebook+social+plugins+7.png"]recommendation[/a]


This plugin features all the recommendations your blog has earned. Whether a particular post or the blog as a whole, the plugin would show that content as recommended by so and so.


Send Button

[a href="https://blogger.googleusercontent.com/img/b/R29vZ2xl/AVvXsEibenuEuN-00Xlr4M69ytXRNl1HBu0QvKgdyBmY5AwPJbKciHOzm3hkqDEOGplmhJnMkiZjrJy6rhyDJSepr126R8ZVP4jKYwSw9xEDFhdNyLx1CQEFpgIfNHzrASwroPfz8z_OTInCiQE/s1600/facebook+social+plugins+8.png"]send button[/a]The Send Button allows users to easily send content to their friends. People will have the option to send your URL in a message to their Facebook friends, to the group wall of one of their Facebook groups, and as an email to any email address. Though Facebook like button has a "Send" button too now so there is no as such need of this button.

You can add it to your blogger blogs by reading this tutorial: [a href="http://www.mybloggertricks.com/2011/05/add-facebook-send-button-to-blogger.html" target="_blank"]Facebook Send Button[/a]


Which one to choose?

Facebook social plugins are really one of the best out there as part of social tools available online. Its not necessary that you should use all of them to get online success. Instead work out your needs and then choose which ones you want. The most famous are Facebook like button / box, comments.

We would like to know which of  these social plugins you use on your blog.

Thanks

  Hassam Ahmad Awan


About the Guest Author:

Hassam is a young A Level Student who loves to learn and share tech related stuff. He has an ambition to become a Software Engineer. He is a passionate blog author and publishes regular tutorials to newbie bloggers at [a href="http://bloggingehow.blogspot.com" target="_blank"]BLoggingeHow[/a].

You can always keep in touch with him at [a href="http://www.facebook.com/pages/BLoggingeHow/126203964129170" target="_blank"]@Facebook[/a]

Source: http://www.mybloggertricks.com/2011/06/9-facebook-social-plugins-for-blogs.html

Post ASCII Comments in Blogger - Grab Attention!

ascii-COMMENTSIf it is possible on Orkut, MySpace, MSN, YAHOO then why not Blogger! ASCII is a character encoding scheme that helps you to draw characters which are not available on normal keyboards. Most modern character-encoding schemes are based on ASCII now. I have shared some examples below to give you an idea what a Blogger ASCII code will look like and I will also post the first comment to make sure no one takes my turn. =p This way is although not SEO friendly but sometimes you need to grab the authors attention! But please don't post ASCII comments on MBT as I will reply on time always! :>

[a name='more'][/a]

Here are some example made using a [a href="http://www.network-science.de/ascii/" target="_blank"]ASCII Text Generator[/a]


▁ ▂ ▃ ▄ ▅ ▆ █ 100%
─▀██▀───▀██▀─▀██──██─▀██▀▀ ▀─
──██─────██───██▄█▀───██▄█───
──██─────██───██▀█▄───██▀█───
─▄██▄▄█─▄██▄─▄██──██─▄██▄▄ ▄─ Thank you!


 ______  __                       __               __     
/__ _/ / /
/_/ / ___ __ ___ /' ____
_ ` /'__` /' _ ` , < /',__\
/ L._/ / \` /__, `\ _
_ _ _ __/._ _ _ _ _/____/ /_
/_/ /_//_//__//_//_//_//_//_//___/ /_/


_/_/_/_/_/ _/ _/ _/
_/ _/_/_/ _/_/_/ _/_/_/ _/ _/ _/_/_/ _/
_/ _/ _/ _/ _/ _/ _/ _/_/ _/_/ _/
_/ _/ _/ _/ _/ _/ _/ _/ _/ _/_/
_/ _/ _/ _/_/_/ _/ _/ _/ _/ _/_/_/ _/


 _____  _                    _            _ 
/__ | |__ __ _ _ __ | | __ ___ /
/ //| '_ / _` || '_ | |/ // __| / /
/ / | | | || (_| || | | || < __ /_/
/ |_| |_| __,_||_| |_||_|_|___//


@@@@@@@ @@@@@@ @@@@@@ @@@ @@@
@@@@@@@@ @@@@@@@@ @@@@@@@@ @@@ @@@
!@@ @@! @@@ @@! @@@ @@! @@!
!@! !@! @!@ !@! @!@ !@! !@
!@! @!@ !@! @!@ !@! @!! @!@
!!! !@! !!! !@! !!! !!! !!!
:!! !!: !!! !!: !!! !!:
:!: :!: !:! :!: !:! :!: :!:
::: ::: ::::: :: ::::: :: :: :::: ::
:: :: : : : : : : : : :: : : :::


 ___    _____  _____  _      _ 
( _` ( _ )( _ )( ) ( )
| ( (_)| ( ) || ( ) || | | |
| | _ | | | || | | || | _ | |
| (_( )| (_) || (_) || |_( )| |
(____/'(_____)(_____)(____/'(_)
(_)


                               __ 
__ _ _ _ _ | |
| | |_|| |_ ___ |_|| |_ | |
| |__ | || '_|| -_| | || _||__|
|_____||_||_,_||___| |_||_| |__|


 _______                              _ 
(_______) _ | |
_ ___ ____ _____ _____ _| |_ | |
| | (_ | / ___)| ___ |(____ |(_ _)|_|
| |___) || | | ____|/ ___ | | |_ _
_____/ |_| |_____)_____| __)|_|


  ___|                |   |
| __| _ _` | __| |
| | | __/ ( | | _|
____|_| ___|__,_|__|_)


 _       __ ____  _       __ __
| | / // __ | | / // /
| | /| / // / / /| | /| / // /
| |/ |/ // /_/ / | |/ |/ //_/
|__/|__/ ____/ |__/|__/(_)


(¯`·._.·[ Oh Thank you Buddy! ]·._.·´¯)


°o.O Thank you Buddy! O.o°


×÷·.·´¯`·)» Thanks! «(·´¯`·.·÷×


,.-~*´¨¯¨`*·~-.¸-(_Beautiful!_)-,.-~*´¨¯¨`*·~-.¸


<º))))><.·´¯`·.Thank you!¸.·´¯`·.¸><((((º>


----•(-•Thanks Thanks!•-)•----


»-(¯`v´¯)-» Loved it! »-(¯`v´¯)-»


;)°¨¨°º°¨¨°(*)(_.·´¯`·«¤°Thank you Pal!°¤»·´¯`·._)(*)°¨¨°º°¨¨°;)


«««««««Thank you Dude!»»»»»»»»


If you know another good ASCII Text generating website then please share it in the comments. Let us know what style have you got?

Source: http://www.mybloggertricks.com/2011/06/post-ascii-comments-in-blogger-grab.html

Design and Create Blogger Widgets - The Secret!

<center><span style="border-bottom: #8080ff 10px solid; border-left: #8080ff 10px solid; padding-bottom: 6px; padding-left: 6px; padding-right: 6px; border-top: #8080ff 10px solid; border-right: #8080ff 10px solid; padding-top: 6px; -moz-border-radius: 10px; -webkit-border-radius: 10px"><font color="#8080ff"><strong>Hello Brother!</strong></font></span></center>


Don't be confused with the large chunk of code above, CSS is the most interesting and most easiest web language of all. Just the way you make sentences using alphabets we use bits and pieces to create a CSS class.

So How will you design a widget?

Whether you wish to become a designer or you wish to be able enough to customize your template and posts, learning both CSS and HTML is a must now for a happy blogging career. I learnt designing by tweaking Blogger templates and by reading tutorials on [a href="http://www.w3schools.com/" target="_blank"]w3schools[/a]. There are three important practical tips that I can give:

  1. Go and Learn Photoshop. Find a nearby institute where [a href="http://www.mybloggertricks.com/2010/01/photoshop-image-editing-basics-for.html" target="_blank"]Photoshop[/a] is taught. Take a course of no more than 1 month.
  2. Start reading at least 5 tutorials per day of [a href="http://www.w3schools.com/html/default.asp" target="_blank"]HTML[/a] at w3schools
  3. After you learnt the basics of HTML then start the [a href="http://www.w3schools.com/css/default.asp" target="_blank"]CSS tutorials[/a] and read at least 4 tutorials daily at w3schools

This entire hard work will take you no more than a month. After having learnt everything, you will start experimenting and practicing them the next month and on the third and fourth month you deserve to be called a Designer!

After you have developed your designing skills then you can also go and start learning JavaScript, php, jQuery etc.

I have shared whatever that is practical and affordable to all of you. If you think you can hire a teacher for HTML and CSS then it is even more good but trust me Photoshop is the only thing I learnt in an institute, the rest of all my skills are self thought thanks to helpful internet and w3schools in general. The best thing about w3schools is that you can use their HTML editor to create and preview the code at the same time just like MBT HTML Editor. This thing will build up solid skills within a short time of span.

Keeping everything aside, I will be always there for constant help and support. I wish you may find the topic and tips today helpful in order to better enjoy your lives online. Please never give up and utilize this golden life opportunity effectively. Peace and blessings friends.

Source: http://www.mybloggertricks.com/2011/06/design-and-create-blogger-widgets.html

Recent Posts Widget By Blogger

imageI shared a tutorial earlier on how to add a [a href="http://www.mybloggertricks.com/2009/05/feedburner-recent-post-widget-fast.html" target="_blank"]Recent Posts Widget[/a] provided by Feedburner. However just this year blogger introduced their own Feed widget that takes the URL of your FEED and displays the links to your posts with some limited options. The widget by feedburner however has many options but if you need a shortcut then here it is:

[a name='more'][/a]


[a href="http://zailab.blogspot.com/" target="_blank"]Live Demo[/a]


Add Recent Posts Widget To Blogger

  1. Go To Blogger > Design > Page Elements
  2. Click "Add a Gadget"
  3. Choose the FEED Widget

feed widget

   4.  Select it and submit in it the FEED URL of your posts which looks like this,

http://zailab.blogspot.com/feeds/posts/default


   5.   Replace http://zailab.blogspot.com with your blog link

feed URL

   6.  Click Continue

   7.  You then have 4 options. You can at most display 5 links, with dates, author names and you can make them to open in a new window. I will recommend that you keep the default settings.


feed settings

     8.  Hit Save and you are done!

If you want more control over your options and wish to add a recent posts widget just like mine then try the Feedburner [a href="http://www.mybloggertricks.com/2009/05/feedburner-recent-post-widget-fast.html" target="_blank"]Recent Posts[/a] Widget

Source: http://www.mybloggertricks.com/2011/06/recent-posts-widget-by-blogger.html
 
Play : Agame | Y8 Games | Y3 Games
Copyright © 2011. Blogger Tips And Tricks 2012 - All Rights Reserved

Proudly powered by Blogger