How to Setup a Sub Domain on a Blogger Custom Domain Blog

Add Sub domain on a Blogger Custom Domain

This tutorial is for all those who are already using Custom Domains with Blogger. If you already have a blogger blog at some Custom domain like www.yourdomain.com , then you might want to add a sub domains to this custom domain like blog.yourdomain.com gallery.yourdomain.com etc. An example of such a sub-domain is bloggertemplates.bloggerplugins.org It is a blogger powered blog, which i created on the sub-domain. In order to create blogs at sub-domains, you need to create CNAME records for the same.

Create Sub Domain on a Blogger Custom Domain

Here we will learn how we can add a new sub domain to your blogger custom domain blog. As an example we will learn how to create a sub domain blog.yourdomain.com to your custom domain blog. (If you have need some other sub-domain change blog with what you want). To do that we need to create a CNAME record.

1. blog.yourdomain.com pointing to ghs.google.com

If you are having a self hosted website, then you will have to create this CNAME Record with your Web Host.You might be able to do it from the “Simple DNS Zone Editor” in most cPanels. If you don’t have such an option, contact your Web Host and ask them to create these two CNAME records for you.After creating this record with your webhost(and after it has propagated), publish your BlogSpot blog to that sub domain(Skip the tutorials for CNAME Creation on Different domain Registrars. They are not applicable for Self hosted Websites)

If you don’t have a self hosted  website,then to create the CNAME you need to login to your domain control panel. Different Registrars have different interfaces(we have listed 4 of them here) but the basic thing is that you need to create the CNAME Record. If you bought the domain via blogger, then you have to first login to Google APPS to get into your Domain Control panel

If you bought the domain from Blogger

If you bought the domain from within Blogger, then you have to get into your domain control panel. To do that go to

http://google.com/a/cpanel/yourdomain.com

you will have to replace yourdomain.com with your domain name. From the Google APPS dashboard, Go to Domain Settings > Domain Names and click on Advanced DNS Settings. From the new page, Sign in to DNS Console(of Enom or Godaddy with the username and password that you get from here.)

CNAME Creation on Different Registrars

1. Creating  CNAME on Enom

1.Login to your Enom account(If you signed in from Google APPS, you can directly proceed to sep 4)

2.From the drop-down menu at the Domains tab, select My Domain and you will be directed to the Manage Domains  page.

3.Click on your domain name

4.To add a CNAME record, click NEW ROW.

5.Enter blog as Host Name , ghs.google.com  as Address  and CNAME as Record Type

Creating  CNAME on Enom

2. Creating  CNAME on Godaddy

Godaddy has come up with a simple  Tool which will automatically create the CNAME records for you. So if you are on Godaddy just Go to this Go Daddy tool

bloggergodaddy[3]

Enter your Subdomain name there e.g. : blog.yourdomain.com

(Use the correct sub-domain where you want your blog to appear) and click on the Confirm Button. The CNAME Records have been created for you automatically.

3. Creating  CNAME on Name.com

1. Login to your Name Account

2.Click on  Account and then on your Domain name

3.Click on DNS Management form the Right Sidebar and add the details as shown in the screenshot and Submit

Creating  CNAME on Name.com


4. Creating  CNAME on Namecheap.com

1. Login to your Namecheap account and click on your domain name.

2.From the Left Sidebar, Click on All Host Records

3.Add the Records as shown in the Screen shot

Creating  CNAME on Namecheap.com

Switching your BlogSpot blog to the Custom Sub-Domain

I assume that you have already have a blog which you want to switch to the custom-sub domain. Get into its Dashboard and navigate to Settings > Add Custom Domain and click on the link saying “Already own a domain? Switch to advanced settings” Now provide the URL blog.yourdomain.com . Type the captcha and save the Settings.

image

If you are still unable to figure it out, contact me via comments or on the Forum


Source: http://www.bloggerplugins.org/2010/03/sub-domain-on-blogger-custom-domain.html

How To Setup Google Apps on Your Website

How To Setup Google Apps on Your Website

Google Apps is a service from Google for using Google products like mail, docs, calendar etc on your domain name.Google Apps has a free version and you can signup for that and get the Google products at your domain name. You will get a GMail interface for email handling on your domain. You will be able to use this custom email addresse(yourname@yourdomain.com) on Google Talk or any other Jabber Client.If you bought a Custom Domain from Blogger,then you have already created the Google Apps account and so you can ignore this tutorial.

Signing up for the Free Version Of Google Apps

1. Go to this link http://www.google.com/a/cpanel/domain/new and signup for Google Apps

google-apps

2.When you finish the Signup Process, you will be taken to the Google Apps Dashboard and you will be asked to verify your Domain Ownership.

google-apps-verify-domain-ownership

Choose the method which is appropriate for you. If you are using a Self hosted website, then the HTML File upload method may be easier for you. If you are using a Blogger Custom domain, then you will have to do the CNAME based verification

If you are on a Blogger Custom Domain, you will have to create the verification CNAME from your Domain Control Panel. If you have a self hosted website and you opted for the CNAME based Verification, then make a support ticket with your webhost asking them to create the CNAME for you(that is why the file upload method might be easier for you). Once they have created the CNAME(or you uploaded the file as per the instructions), you can verify your domain ownership.

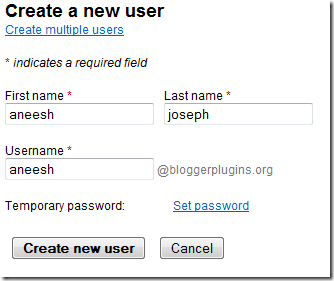
3.If you already using mail accounts on your host, then make the same accounts again on Google APPs. eg: If you are already using an email account (aneesh@yourdomain.com), then make the same user account(Create new Users link) on Google Apps

. create-accounts

create-user

Create Accounts for each of your existing @domain email addresses.

4.Now Activate email from your Google APPs Dashboard. Make sure that you have completed Step 3 before doing this.

activate-email

5.You will see some instructions to Create MX Records. If you are using a CPanel Hosting, then login to your CPanel and Click on MX Entry under Email

cpanel-email

Select the Domain of your choice from the Dropdown and delete all existing MX Records for that domain. Add these 5 MX records

Priority Destination
10 ASPMX.L.GOOGLE.COM
20 ALT1.ASPMX.L.GOOGLE.COM
20 ALT2.ASPMX.L.GOOGLE.COM
30 ASPMX2.GOOGLEMAIL.COM
30 ASPMX3.GOOGLEMAIL.COM

The Final CPanel MX records will look like

cpanel-email-config

If you are using a Blogger Custom Domain, then you will have to Create these MX entries from your Domain Control Panel. Godaddy provides an automatic configuration tool to create these 5 MX Records.For other Domain Registrars follow the instructions provided in the Activate Email page of Google APPs. Once you are done with creating the MX records Click “I have completed these Steps

image

6.Now you have configured your email. You can now access your email at http://mail.google.com/a/yourdomain.com . If you want to use a custom url, then you will have to create a corresponding CNAME record. For example if you wish to access your mail at mail.yourdomain.com , then you will have to create a CNAME for mail pointing to ghs.google.com . You can Change to a custom url from the Email Settings in Google Apps Dashboard .Similarly you can assign custom urls to the other Google Apps like Sites and Docs after activating them.


Source: http://www.bloggerplugins.org/2010/03/setup-google-apps-on-your-website.html

Create Newsletter for your Blogger Blog

Add Sub domain on a Blogger Custom Domain

Newsletter is a good option when you want to send custom mails to your blog readers. It lets you send content rich HTML emails to your readers.Its not like the Feedburner Email Subscription(which just sends post updates via email at regular intervals) .You will be able to compose and send the newsletter at any time. Here are the steps to enable and send Newsletters.

1. Go to http://google.com/friendconnect and login there

2.Click on your Blog Name from the Left Pane.(If your blog is not already there, then add it)

create-newsletter-using-google-friend-connect

3.Click on the Send a newsletter Option

send-newsltter

4. Click the check box which says “Ask visitors to subscribe immediately after their first sign-in". After that Click on the Newsletter Gadget Tab.

configure-newsletter

5.Customize the Colors and other Options and Click on the Generate Code Button and Copy the Code from there.

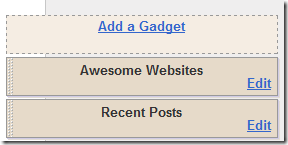
6.You need to add this Code to your website. If you are using blogger, then Go to the Layout > Page Elements and Click on the Add a Gadget Link

add-gadget

Opt for HTML/JavaScript Gadget

add-html-javascript-gadget

and paste the copied Code into the Box Which appears and Save the Gadget

7.Now your blog readers will be able to subscribe to your Newsletters.

When you have enough subscribers, you can Compose the Newsletter from the Compose newsletters tab ,When you are done with creating the newsletter, Click on the Preview and send newsletter button and Click on the Send newsletter button from the popup preview window. you can see how many recipients will receive the newsletter.(In my case it is Total recipients : 539 as shown in the screenshot)

preview-and-send-newsltter

Newsletter subscription is just one of the different Friend Connect Gadgets. There are many more on the Friend Connect Website.You can read about them  at Some friend Connect Gadgets that you might not know about


Source: http://www.bloggerplugins.org/2010/03/create-newsletter-for-your-blogger-blog.html

Stumble Upon Count Buttons for Blogger

stumbleupon-counter-for-blogger Like all other Social networks, StumbleUpon has also got some really elegant sharing buttons. StumbleUpon has got 6 different  sharing buttons.  You can choose any of these six. Integrating this into your blogger blog will require some template Edits.

image

How to add the Stumble Upon Counter Button  to Blogger?

1. First of all pick one of these 6 Button Styles.

2.Now Login to your Blogger Template and navigate to Design   >  Edit HTML and click on the check box which says “Expand Widget Templates”

3. Look for <data:post.body/> and immediately above it paste the following code.

<b:if cond='data:blog.pageType == "item"'>
<div style="float:right;padding:4px;">
<script expr:src='"http://www.stumbleupon.com/hostedbadge.php?s=5&amp;r=" + data:post.canonicalUrl'/>
</div>
</b:if>


4.Save the Template and you will see a vertical Stumbleupon counter(style 5) on your post. In the code above, you can change s=5 to s=1 or s=2 or s=3 or s=4 or s=6 to get the other button styles.


5. If you need the counter on every page, then remove the two lines of code in Green Color.


6. If you want the button to appear on the left side, then change float:right to float:left


Source: http://www.bloggerplugins.org/2010/04/stumble-upon-count-buttons-for-blogger.html

How to remove quick edit and wrench icons on Blogger

You might have seen the Pencil , Screwdriver and Spanner links on blogger. It seems like these icons appear only when you are logged in to your blog. But if you take a look at your Blog's Source From your Browser's View source option, then you will find that there are plenty of quick edit links on your blog even if you are not logged in(Do a Find for blogger.com ). These are the quick edit  links and these will  be hidden using CSS if you are not logged into your blogger account(but still be present in your blog as hidden links).

What is the use in Removing these Links?

You will be able to reduce the number of external links on your Blog and make it more Search Engine Friendly

Do i loose anything if i  remove these Links ?

You will no longer see the Quick Edit pencil image  or wrench links quick-edit-wrench-blogger  on your blog   . If you want to Edit a Gadget, you will have to go to the Layout > Page Elements Page .

How Do i remove the Wrench and Quick Edit?

1. Go to Layout > Page Elements and Click on the Edit Button on the Blog Posts Gadget. Uncheck the Show Quick Editing Option and Save the Settings

show-quick-editing

2. Go to Layout > Edit HTML and Click the Check box to Expand your Widget Templates

Replace all Occurrences of

<b:include name='quickedit'/>


with


<!--b:include name='quickedit'/-->


3. Save The Template and look at your Page Source Once again. You will find that those links are no longer there.


4 The Wrench Link of the Followers Gadget Cannot be removed. If you really want to remove that, then remove the Followers Gadget and Add it as a HTML/ JavaScript Gadget with the Code from Google Friend Connect.


How do i get the Quick Edit and Wrenches back  on my blog?


If you ever feel the need to get back these buttons, then just follow the reverse process.


1. Go to Layout > Page Elements and Click on the Edit Button on the Blog Posts Gadget. Check the Show Quick Editing Option and Save the Settings


show quick editing


2. Go to Layout > Edit HTML and Click the Check box to Expand your Widget Templates


Replace all Occurrences of


<!--b:include name='quickedit'/-->


with


<b:include name='quickedit'/>


and Save the Template and it will be back to normal.


Blogger Actually provides an Option in Settings > Basic to Hide the Quick Edit Links. But this doesn't actually remove the Quick Edit links. They are just made invisible


I hope that the Blogger Team will remove these Quick Edit Links completely(when author is  not logged in) rather than hiding them.


Source: http://www.bloggerplugins.org/2010/04/remove-quick-edit-and-wrench-on-blogger.html

Remove Blogger Nav bar Completely

image

Blogger has got a default Navigation Bar. This navigation bar is hidden in most of the third party templates. Instead of hiding the nav bar using CSS, we can completely remove it.

To do that

1. Login to your Blogger account and navigate to Layout > Edit HTML

2. In the Template Code find <body> and just above that add the following Code.

<!--<body>-->


3. Now Save the Template and you will see a confirmation about deleting the Navbar Widget. Confirm the Deletion by Clicking on the Delete Widgets Button


image


4.Now your Nav bar is completely removed from your Blog.


Advantages of this Method


You will be completely removing the nav bar and not hiding it. The nav bar iframe codes wont be present in your blog’s HTML source and so the blog  would be more Search Engine Friendly and your blog will have a more valid XHTML code..


Disadvantages of this Method


You will no longer see the Quick Edit pencil image  or wrench links quick-edit-wrench-blogger  on your blog even if you are logged in. This is not a a big deal. You can Edit the Widgets from the Layout > Page Elements Page. You wont see the Comment Delete icon near your comments even if you are logged in.But you can definitely manage the comments from the Blogger Comment Tab.It would also be a good idea to completely remove the Quick Edit and Wrench Links from Blogger


How to Get back the Nav Bar?


If you followed this method to remove the nav bar and now want to get it back, then  delete the extra code that you added. i.e remove the code from step 2, that you added into your template and Save the Template.


Source: http://www.bloggerplugins.org/2010/04/remove-blogger-nav-bar-completely.html

Facebook Like Button For Blogger

Facebook Like Button For Blogger

This Tutorial will help you in adding a Facebook Like Button For Blogger. Facebook has come up with a new set of Social plugins which enable you to provide engaging social experiences to your users with just a line of HTML. The Facebook Like Button is One of them. You can see a demo of the like button on this page. The Facebook like button will allow your readers to quickly share your posts with their Facebook Friends. You can also get to know how many people liked your Blog Post .This tutorial will teach you to add a Facebook Like button for Blogger

How to Add the Facebook Like Button Below every Post

1. First Generate the Facebook code using the options below. (Code will be updated with these details)


Button Type
Text on Button
Show Send Button
Color Scheme
Font
Float
Location of the Button
Display
<div>
<b:if cond='data:post.isFirstPost'>
<script>(function(d){
var js, id = 'facebook-jssdk'; if (d.getElementById(id)) {return;}
js = d.createElement('script'); js.id = id; js.async = true;
js.src = "//connect.facebook.net/en_US/all.js#xfbml=1";
d.getElementsByTagName('head')[0].appendChild(js);
}(document));</script>
</b:if>
<fb:like expr:href="data:post.canonicalUrl" layout='standard' send='true' show_faces='false' font="arial" action="like" colorscheme="light"></fb:like>
</div>

2. Copy the Above code. Login to your Blogger Account and go to Design > Edit HTML and click on the check box which says “Expand Widget Templates

3. Look for <data:post.body/> and immediately below that place the copied code.

4.Next you have to add the fb namespace to your template tag.Your template should have the specification for the fb tag that you have used. The following namespace declaration will take care of that. To declare the namespace, find

<html

and change it to

<html xmlns:fb="https://www.facebook.com/2008/fbml"

The following screenshot will help you out.

image This is necessary for all FBML widgets using the fb tag.  So if you have already added the namespace while adding some other FB plugin, then you can skip this.

4. Now Save the template and you should see the Like Button near each of your posts. You are done :)

Do you feel that the Like Button is boring and not so likable? – Then checkout the Facebook Like box, a styled version of the Like Button which would definitely bring you more “Likes” Also Check out :

  1. Facebook Share Count Buttons For Blogger

  2. Create Facebook Fan Page for your Blog


If you liked this post, then consider “Like” ing it :)

Permalink : Facebook Like / Recommend Button For Blogger


Source: http://www.bloggerplugins.org/2010/04/facebook-like-button-for-blogger.html
 
Play : Agame | Y8 Games | Y3 Games
Copyright © 2011. Blogger Tips And Tricks 2012 - All Rights Reserved

Proudly powered by Blogger