<b:widget id='Label1' locked='false' title='Labels' type='Label'>
<b:includable id='main'>
<b:if cond='data:title'>
<h2><data:title/></h2>
</b:if>
<div expr:class='"widget-content " + data:display + "-label-widget-content"'>
<b:if cond='data:display == "list"'>
<ul>
<b:loop values='data:labels' var='label'>
<li>
<b:if cond='data:blog.url == data:label.url'>
<span expr:dir='data:blog.languageDirection'><data:label.name/></span>
<b:else/>
<a expr:dir='data:blog.languageDirection' expr:href='data:label.url'><data:label.name/></a>
</b:if>
<b:if cond='data:showFreqNumbers'>
<span dir='ltr'>(<data:label.count/>)</span>
</b:if>
</li>
</b:loop>
</ul>
<b:else/>
<div id='labelCloud'/>
<p align='center'>
<script type='text/javascript'>
var cloudMin = 1;
var maxFontSize = 30;
var maxColor = [35,130,196];
var minFontSize = 13;
var minColor = [35,130,195];
<b:if cond='data:showFreqNumbers'>
var lcShowCount = true;
<b:else/>
var lcShowCount = false;
</b:if>
// Don’t change anything past this point -----------------
// Cloud function s() ripped from del.icio.us
function s(a,b,i,x){
if(a>b){
var m=(a-b)/Math.log(x),v=a-Math.floor(Math.log(i)*m)
}
else{
var m=(b-a)/Math.log(x),v=Math.floor(Math.log(i)*m+a)
}
return v
}
var c=[];
var labelCount = new Array();
var ts = new Object;
<b:loop values='data:labels' var='label'>
var theName = "<data:label.name/>";
ts[theName] = <data:label.count/>;
</b:loop>
for (t in ts){
if (!labelCount[ts[t]]){
labelCount[ts[t]] = new Array(ts[t])
}
}
var ta=cloudMin-1;
tz = labelCount.length - cloudMin;
lc2 = document.getElementById('labelCloud');
ul = document.createElement('ul');
ul.className = 'label-cloud';
for(var t in ts){
if(ts[t] < cloudMin){
continue;
}
for (var i=0;3 > i;i++) {
c[i]=s(minColor[i],maxColor[i],ts[t]-ta,tz)
}
var fs = s(minFontSize,maxFontSize,ts[t]-ta,tz);
li = document.createElement('li');
li.style.fontSize = fs+'px';
a = document.createElement('a');
a.title = ts[t]+' Posts in '+t;
a.style.color = 'rgb('+c[0]+','+c[1]+','+c[2]+')';
a.href = '/search/label/'+encodeURIComponent(t);
if (lcShowCount){
span = document.createElement('span');
span.innerHTML = '('+ts[t]+') ';
span.className = 'label-count';
span.style.color = 'rgb('+c[0]+','+c[1]+','+c[2]+')';
a.appendChild(document.createTextNode(t));
li.appendChild(a);
li.appendChild(span);
}
else {
a.appendChild(document.createTextNode(t));
li.appendChild(a);
}
ul.appendChild(li);
abnk = document.createTextNode(' ');
ul.appendChild(abnk);
}
lc2.appendChild(ul);
</script>
</p>
<noscript>
<b:loop values='data:labels' var='label'>
<span expr:class='"label-size label-size-" + data:label.cssSize'>
<b:if cond='data:blog.url == data:label.url'>
<span expr:dir='data:blog.languageDirection'><data:label.name/></span>
<b:else/>
<a expr:dir='data:blog.languageDirection' expr:href='data:label.url'><data:label.name/></a>
</b:if>
<b:if cond='data:showFreqNumbers'>
<span class='label-count' dir='ltr'>(<data:label.count/>)</span>
</b:if>
</span>
</b:loop>
<br/>Powered By:<small><a href='http://www.bloggerplugins.org'>Blogger Gadgets</a></small>
<br/><small><a href='http://www.bloggerplugins.org/2008/06/label-cloud-widget-for-blogger-blogspot.html'>Label Cloud for Blogger</a></small>
</noscript>
</b:if>
<b:include name='quickedit'/>
</div>
</b:includable>
</b:widget>
Label Cloud Widget For Blogger / Blogspot
Star Ratings on Blogger
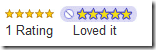
Blogger has added a Star Ratings Feature for us. It helps the visitors to rate your blog posts using 5 stars :). If you want to see a preview of how this looks, then go to this post page and try rating this post. I you are interested in implementing the ratings feature on your blog, then read on and follow these simple steps.
How to Enable The Star Ratings Feature?
- Login to Your Blogger in Draft Dashboard at http://draft.blogger.com (May not be available in your regular dashboard)
- Go to Design > Page Elements and Click on the Edit Button near the Blog Posts Gadget and check the “Show Star Ratings” Option
- You can Drag and Drop the “Star Ratings” and place it where you want.
- Now if everything went right, then you should be able to see the Star Ratings Feature on your Blog. If not then read on. :)
- If it didn’t appear then don’t worry, That is because you are having a modded template. Just Go to the Edit HTML page under the Design Tab , Check the “Expand Widget Templates” Option and locate
<p class='post-footer-line post-footer-line-3'>
Or if that is not there then find
<div class='post-footer-line post-footer-line-3'>
Or if that is not there then find
<data:post.body/>
and place the following code just below any of these lines[whichever is present in your template].
<span class='star-ratings'>
<b:if cond='data:top.showStars'>
<div expr:g:background-color='data:backgroundColor' expr:g:text-color='data:textColor' expr:g:url='data:post.absoluteUrl' g:height='42' g:type='RatingPanel' g:width='280'/>
</b:if>
</span>
and Save the template
Yahoo Search Widget Blogger / Blogspot
This search box has the yahoo branding logo inserted within the search box.By default the search widget will search your blog.The user can opt to search the entire web if he wants..
Your blog must be properly indexed by yahoo for this to work efficiently..
The To install the widget you may use the widget installer below..
Note:-If you are reading this in a feed reader the widget installer may not be displayed properly..So just visit the original post to get it installed..
Increase Width of Blogger Comment Form
Blogger’s Embedded Comment Form comes in a fixed pixel size. So it might look bad in templates which have a wider post area. so how can we make it look better? – Just adjust the Comment form and increase its width.
So here is what the Transition will look like :)
would change to
How To Increase the Width of the Comment Form?
1.Go to Blogger Dashboard > Layout > Edit HTML and opt to expand the Widget Templates.
2. Now look for the code which looks like
3.To increase the width just change the 100% with the actual pixel size which you need. For example try changing 100% to 560px ,save the template and see the effect. Adjust the pixel size properly till you get the required width for your blogger comment form :)
Reactions on Blogger
Blogger has added a reactions Feature for us. It helps the visitors to react to your blog posts in an interesting way. Blogger has got a default set of reactions(funny, interesting, cool). You can edit them and add your own. If you want to see a preview of how this looks, then go to this post page and mark your reactions :) I you are interested in implementing the reactions feature on your blog, then read on and follow these simple steps.
How to Enable The reactions Feature?
- Login to Your Blogger Dashboard
- Go to Design > Page Elements and Click on the Edit Button near the Blog Posts Gadget and check the “Reactions” Option
- If you want to edit the Reactions, then click on the Edit link near to the reactions.
- You can Drag and Drop the “Reactions” and place it where you want.
- Now if everything went right, then you should be able to see the Reactions Feature on your Blog. If not then read on. :)
- If it didn’t appear then don’t worry, That is because you are having a modded template. Just Go to the Edit HTML page under the Design Tab , Check the “Expand Widget Templates” Option and locate
<p class='post-footer-line post-footer-line-3'>
Or if that is not there then find
<div class='post-footer-line post-footer-line-3'>
Or if that is not there then find
<data:post.body/>
and place the following code just below any of these lines[whichever is present in your template].
<span class='reaction-buttons'>
<b:if cond='data:top.showReactions'>
<table border='0' cellpadding='0' cellspacing='0' width='100%'>
<tr>
<td class='reactions-label-cell' nowrap='nowrap' valign='top' width='1%'>
<span class='reactions-label'>
<data:top.reactionsLabel/></span></td>
<td><iframe allowtransparency='true' class='reactions-iframe' expr:src='data:post.reactionsUrl' frameborder='0' name='reactions' scrolling='no'/></td>
</tr></table>
</b:if>
</span>
and Save the template
Print your Blogger Posts by adding a Print Button
A “Print this Post” button would be much useful on blog posts(especially on tutorial and recipe blogs). Before adding the Print this button to your blog, you have to make your blog Printer Friendly. You can do this by adding some CSS to your blogger template. You can decide which parts of your blog page should be printed and which parts shouldn’t be. For example it would be better if your blog’s header , sidebars and comments don't appear in the prints. We can achieve this adding some printer specific CSS. If you want you can check out how this page will look when printed, Click File Menu of your Browser and Click Print Preview. You will notice that the header, footer, sidebars comments and other unimportant text wont appear in the print. I have hidden them all using CSS. Here are the steps to implement the same on your blog.
Making your Blog Printer Friendly
1. Login to your blogger account and go to Layout > Edit HTML and look for
</head>
2.Just above this line, we will insert our CSS which will define how the page should be printed, and what all shouldn’t be printed on it.(you can further modify it according to your needs.you can decide which selectors should be displayed and which shouldn't)
<style type="text/css" media="print">
#header-wrapper,#header,.header, #sidebar-wrapper,.sidebar, #footer-wrapper,#footer,.date-header,.comment-link,.comment-footer,#comments,#blog-pager,.feed-links, #backlinks-container, #navbar-iframe,.dontprint {display: none;}
.post,#content-wrapper,#main-wrapper,#main{width:100%}</style>
3.Save the template and view your blog. Now from the File menu of your Browser Click on the Print Preview
4.Adjust the CSS(hide more selectors) until all unwanted elements are hidden on the Print Preview Page.
5.Now your Blog is Printer Friendly.
Adding The Print This Link
1. Go to Layout > Edit HTML and Click the Check box to expand the Widget templates.
2.Look for
<data:post.body/>
and below that paste the following code
<b:if cond='data:blog.pageType == "item"'>
<span style='background: url(https://blogger.googleusercontent.com/img/b/R29vZ2xl/AVvXsEjDcQ3-e6OcbXWOI3amJhQ4RbEpUn-Lh6AerV8cenGvgbTyj7W4_rIl_fQcs1P44y6Js3po9myKmv_f7ViWHvHrzLpJXKK2I2pYz8_WevN66epnHwOVhYo2miF9aIRR8316bLAWWaCf0kE/s1600/print-this.png) left no-repeat; padding-left: 25px;display:inline;'><a href='javascript:window.print()' rel="nofollow" >Print this post</a></span>
</b:if>
This will add a Print This link below your post(on the post page).
Bugs :(
1. The complete page is not getting printed.It prints the first page only and truncates the rest.
Solution : - If your template uses the CSS properties float and overflow, then this problem might arise. A method to fix this is to reset the float and overflow styles of the selectors to the default values none and visible respectively(reset the selector styles in the printer css)
You can try printing this Tutorial using the Print this link below :)
Print this post
Top Authors Widget For Blogger / Blogspot
Now you should have a working Top Authors widget on your blogger blog!This widget will encourage your blog team authors to write more and more..