Add Twitter Follow Button to Blogger Blogs

twitter follow buttonTwitter follow button has started gaining great attention from blogosphere. More and more blogs are adding it just near the post titles or on top sidebar to increase the number of their twitter followers and indirectly increase their pageviews. This button is an official button created by twitter developers and does not belong to a third part. As opposed to the retweet button this button loads quickly and doesn't disturb the load time of your website.

[a name='more'][/a]


Adding Twitter Follow button to Blogspot Blogs

To add the button to the widget section of your BlogSpot blogs i.e. Sidebars, below or above Post body, header etc. then do this

  1. Go to Blogger > Design
  2. Choose HTML/Javascript Widget
  3. Paste the following code inside it and drag the widget to add your button to any location you want

<a href="http://twitter.com/mybloggertricks" class="twitter-follow-button">Follow @mybloggertricks</a>
<script src="http://platform.twitter.com/widgets.js" type="text/javascript"></script>


Replace mybloggertricks with your twitter user name

    4. Save your widget and you are done!

Add Twitter Follow Button Below Post titles

If you wish to add the button below post titles then do this,

  1. Go To Blogger > Design > Edit HTML
  2. Backup your template
  3. Check the "Expand Widgets Template" box
  4. Search for this code,

<data:post.body/>

     5.   Just above it paste the following code,

<a href="http://twitter.com/mybloggertricks" class="twitter-follow-button">Follow @mybloggertricks</a>
<script src="http://platform.twitter.com/widgets.js" type="text/javascript"></script>

Again make sure to replace the green text with your twitter username.

     6.   Save your template and you are done.

Add Twitter Button To The Bottom Of Every Posts

To add the follow button below all posts on your blogger blogs then repeat the same steps and instead of adding the code above <data:post.body/> add the twitter code below it. That's it!

If you faced any problem just let me know. I will publish another post that will let you fully style and customize the button. Stay tuned.

Source: http://www.mybloggertricks.com/2011/07/add-twitter-follow-button-to-blogger.html

Customize Twitter Follow Button In 7 ways!

Now to make customization changes add the following codes (given below) just before the highlighted yellow text to make the effects take place.

1) To Change the button color you have two choice blue or grey. The blue one is the default one and the grey color is the one that I am using.

twitter grey color

data-button = "grey"

PS: With the grey color you will not be able to see the followers count because its color is automatically changed to white.  So read below..

2) To change the text color use this code,

twitter text color

data-text-color = "#000000"

To change the hexadecimal color use our [a href="http://www.mybloggertricks.com/2008/01/color-code-generator-and-color-wheel.html" target="_blank"]color generator tool[/a]


3) Add this code to change link color,

twitter link color

data-link-color = "#000000"

Again replace the 6 digit hexadecimal code with a color of your choice


4) To Hide the followers count number, use this code,

twitter followers count

data-show-count="false"

If you wish to show counts again then simply change false to true


data-lang="ja"

Simply replace ja with any language code you want.


6) You can adjust the width of the follow button in pixels or percentage using the following code,


data-width="300px"

The default width is 300px. You can increase or decrease it. The default dimensions for the follow button are 300px by 20px


7)  You can also align the plugin to left or right just like the float property by using this code,

data-align="right"

You can float the button to either right or left.


Combined Customized code:

The following code will put the important effects in a single button,

customized twitter button

<a href="http://twitter.com/mybloggertricks" data-lang="de" data-text-color = "#0080ff"  data-link-color = "#289728" data-button = "grey" class="twitter-follow-button">Follow @mybloggertricks</a>
<script src="http://platform.twitter.com/widgets.js" type="text/javascript"></script>

You can add your required codes in the similar manner as shown in the above code.

Any Questions?

You can also visit the [a href="http://dev.twitter.com/pages/follow_button" target="_blank"]developers page[/a] for more info. If you wish to add this button to your blogger blogs then you may read this post:

  • [a href="http://www.mybloggertricks.com/2011/07/add-twitter-follow-button-to-blogger.html" target="_blank"]Add Twitter Follow button to Blogger[/a]

I hope you find it easy and useful to implement. If you have any questions then you are most welcomed to ask for any help if needed by posting your questions in the [a href="#comments" rel="nofollow"]comments box[/a].

Source: http://www.mybloggertricks.com/2011/07/customize-twitter-follow-button-in-7.html

Create Custom Facebook Tab With Custom Icon (1)


To read part 2 then click this link "[a href="http://www.blogger.com/"]Design Welcome Page For your Facebook Fan Page[/a]"


Custom-Facebook-tabThis is part one of our tutorial series on "How to create a [a href="http://www.mybloggertricks.com/2011/07/create-design-custom-tabs-on-facebook.html" target="_blank"]Welcome WebPage[/a] on Facebook". To add branded look to your Fan Pages you need a custom tab so that you could then design the tab to blend your website theme. A tab is basically a link that will appear under the wall and info tabs. On clicking the tab your visitors or fans will be able to see the content inside that tab page.

[a name='more'][/a]


[a href="https://www.facebook.com/pages/My-Blogger-Tricks/147104632016744" rel="nofollow" target="_blank"]Live Demo[/a]


Follow these easy steps,


1. Set Up New Facebook Tab App


Kindly Visit [a href="http://www.facebook.com/developers/apps.php" rel="nofollow" target="_blank"]Facebook Apps Page[/a] and then click the + Set Up New App button.


set up new app


Set the App Name with either your website name or blog name. You can give any name you want and you can change it later too.


app name


Click the the Create App button and enter some security code to proceed further.


2. Configure your Tab App Settings


In the About section, click the "Change you icon" link to upload a 16px by 16px Icon for your tab. My advise is that you upload your website logo like I have done,


change-FB-icon


Before you save your changes, click the Facebook Integration tab. On the Facebook Integration settings page fill up the blanks using the information below. Make sure you note down your Application ID as shown in the screenshot below,


Canvas Page - It is optional. Just write your blog name here.


In each process below, replace YOURAPPLICATIONID with your Application ID


Canvas URL - Enter http://YOURAPPLICATIONID.iframehost.com/


Secure Canvas URL - Enter https://YOURAPPLICATIONID.iframehost.com/


Tab URL - Enter http://YOURAPPLICATIONID.iframehost.com/tab


Secure Tab URL - Enter https://YOURAPPLICATIONID.iframehost.com/tab


IFrame Size - Choose Auto-resize


FACEBOOK-INTEGRATION


Click the Save Changes button. Congratulations you just created a tab successfully! Now just few more steps.


3. Add your Custom Tab App to your Fan/Like Page


Copy your API key and App Secret code and keep them safe in a notepad as we will be needing them later. Now click the Application Profile Page link.


Add-Tab-to-Like-Page


Next click the Add to My Page link to install the page tab


add-to-my-page


Finally select the page you would like to install the tab on.


adding-iframe-tab-to-facebo


4. Visit Your Facebook Custom Tab Page


You will now find the custom tab appearing under the wall and info tabs. Click your Tab. When you visit the tab page for the first time, you will be asked to enter your API Key and APP Secret. Simply fill up the blanks with the App number codes you saved  in a notepad.


facebook-api-key


5. You are now Ready To Design your Welcome Page!


After completing a normal formality, you will now see [a href="http://woobox.com/" target="_blank"]Woobox's[/a] beautiful WYSIWYG Editor just like your Blogger Editor, where you can create amazing designs using your imagination. This is the end of tutorial part -1. On my next tutorial I will be sharing how can you design the Welcome landing page with CSS, HTML and JavaScript. Make sure you don't miss any part by subscribing to our [a href="http://feedburner.google.com/fb/a/mailverify?uri=tntbystc" rel="nofollow" target="_blank"]free email updates[/a]. The fun is yet to begin! Peace out. :d


WYSIWYG Editor

PS: Keep all settings default.
Source: http://www.mybloggertricks.com/2011/07/create-custom-facebook-tab-with-custom.html

How To Arrange Tabs Order In New Facebook Layout?


Note that you can not move the tabs up the default Wall and Info tabs. The tab arrangement can be done on for all facebook tabs or your custom tabs except the two mentioned. I hope this little info may prove helpful to most of you. You can read the tutorial series on how to create an IFRAME tab on facebook below,

  • [a href="http://www.mybloggertricks.com/2011/07/create-custom-facebook-tab-with-custom.html" target="_blank"]Create Custom Facebook Tab[/a]
Source: http://www.mybloggertricks.com/2011/07/how-to-arrange-tabs-order-in-new.html

How to Join Google Plus? and Who Can Join It?


Want to customize the color scheme of G+ and  change its look completely? Try this: [a href="http://www.mybloggertricks.com/2011/07/customize-google-plus-14-ways-to-change.html"]10 Tricks to customize Google+ Theme[/a] [a href="http://bloggingehow.blogspot.com/" rel="nofollow" target="_blank"][/a]


[a href="https://blogger.googleusercontent.com/img/b/R29vZ2xl/AVvXsEgfJAr_Ypu-WiUg48ZzaYdyNF71UelPL2DnqRadc11gdaiJJp0MmRjREuGoGV1UZ7y6BJGbImbBGvV5B_6UHn7-lt7d-ePDS7F7gjr4gX0fJ6a_0fWyGnymjkoHIFunMdTfkFxPTOK49mI/s1600/google+plus+one+1.png"]google plus logo[/a][a href="http://plus.google.com/" target="_blank"]Google Plus[/a] (+) project seems to be one of the greatest creation of Google all time. Google has really changed the way one can surf net and now with plus one, the limits are set to endless. As i was impatient to get to see the new bloggers layout in the same way i cant get hold of my self to use Google Plus one. 

Presently Google isn't allowing to join or sign up for Google plus one openly as its in testing process, though invitation process is going on. You can post your Gmail ID in the comments box below and we can invite you as a free favor. For invitation kindly first subscribe by submitting your email ID by [a href="http://feedburner.google.com/fb/a/mailverify?uri=TntByStc&loc=en_US" rel="nofollow" target="_blank"]clicking here[/a]


Some thanksgivings:


google Plus Invitation


At this point if you don't have any idea about  Google plus one i would  recommend you to get a [a href="http://www.google.com/+/demo/"]tour of it[/a].


[a href="https://blogger.googleusercontent.com/img/b/R29vZ2xl/AVvXsEhr4oyWmA3jqiixp0suY-uNTlzFUpgNDAFVqp_gXFKDGFsbXPj9RzprW43bOtRa-5rdNoLrIuYgXOg0tObBxy8wSQaYYtKbQeCPNlkv0eMIj6bmAYyNwBT7YX4kAd37uca6xXVs9axvvX4/s1600/google+plus+one.png"]google plus [/a]


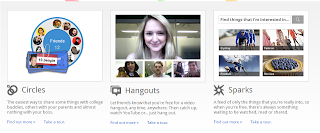
You can [a href="https://services.google.com/fb/forms/googleplusenuk/"]get registered[/a] and get in queue by providing your email address. Google plus one is generally for every Google user and is basically a social networking project that would help connect people in a better way. Many of us are already annoyed with Facebook privacy issues where we don't want to share every thing with every one in our friend list. 
Google plus one has got over that issue and have introduced 'circles'. Its a worth using social  platform and i would definitely recommend over Facebook. That was a general idea of Google plus one project. Ill keep you posted with further Google plus one development.
What do you think about this new development from Google. Do you think it can attract Facebook diehard users?


Guest Post by Hassam Ahmad Awan From [a href="http://bloggingehow.blogspot.com/" rel="nofollow" target="_blank"]Bloggingehow[/a]

Source: http://www.mybloggertricks.com/2011/07/how-to-join-google-plus-and-who-can.html

How To Invite Friends In Google Plus & Create Circles?


Hope this little info proves helpful to most of you. Have fun. Peace out! :)

Source: http://www.mybloggertricks.com/2011/07/how-to-invite-friends-in-google-plus.html

How To Mention a Friend name in Google Plus?

How to Mention Multiple People Names on Google Plus?

To Mention multiple names simply keep on adding there names in the post box as you normally do on other social networks either with the @ symbol or + Symbol. If your friends are registered members then there names will appear hyperlinked as shown below,

Multiple mention

And if they are not registered members then there names will appear without hyperlinks i.e simple text as shown below,

mentioning names in google+


Hope this new method of mentioning your closest ones may seem helpful for most of you. Have fun Googling the new way! :d

If you would like to know more on Google Plus tutorials then kindly read these:

  • [a href="http://www.mybloggertricks.com/2011/07/how-to-join-google-plus-and-who-can.html" target="_blank"]How to join Google+[/a]
  • How to [a href="http://www.mybloggertricks.com/2011/07/how-to-invite-friends-in-google-plus.html?showComment=1310072514376#c5769527729751586414" target="_blank"]find and Invite[/a] Friends in Google+
Source: http://www.mybloggertricks.com/2011/07/how-to-mention-someone-in-google-plus.html
 
Play : Agame | Y8 Games | Y3 Games
Copyright © 2011. Blogger Tips And Tricks 2012 - All Rights Reserved

Proudly powered by Blogger