Add Google Plus One Button on Blogger

Add Google Plus One ( +1 ) Button on Blogger

Google has released an alternative to the Facebook and Twitter Sharing buttons named +1.If you like something that you find on the web, you can hit the +1 button, and your +1's will help friends, contacts, and others on the web find the best stuff when they search. This tutorial will guide you on adding the same to your Blogger Blog.

Checkout this video to know more about the +1 button

Why Should I add the Google +1 Button?

1. The Plus one button will have a  major impact on your Search results. When a friend of yours does a search in Google, your +1s will count.

2. You can get a detailed report about the +1 metric and how it affects your search traffic over at Webmaster Tools. You can read more about it at the Official Google Webmaster Blog - http://googlewebmastercentral.blogspot.com/2011/06/1-reporting-in-google-webmaster-tools.html

Adding Google Plus one (+1) button to Blogger

1. If you are already using the official Blogger Sharing buttons, you should  already be seeing the +1 buttons on your blog. If it is not, then  go to that tutorial, and you will get the answer to how you can fix it.

2. No I don’t want to add those Blogger Sharing buttons, but would love to add the +1 button somehow. If that’s the case, then read on..

3.Generate the Google +1 button code using the following generator.(The codes and the tutorial will be updated with the options that you make using the generator)


Configure the Button Demo


Button Type
Language
Float
Location of the Button
Display

4. Go to Blogger Dashboard > Design > Edit HTML and click on the button which says “Expand widget Templates”. Look for </head> and immediately above that paste

<script type="text/javascript" src="http://apis.google.com/js/plusone.js">
{lang: 'en-US'}
</script>

5. Now look for <data:post.body/> and immediately below that paste

<div>
<g:plusone size="standard" expr:href="data:post.canonicalUrl"/>
</div>

6.Save the template, and you should see the Google  +1 buttons on your blogger blog.

You think its cool?, then  +1 it :P


Source: http://www.bloggerplugins.org/2011/06/add-google-plus-one-button-on-blogger.html

Awesome Blogger Dashboard

awesom-blogger-dashboardBlogger has been rolling out the new UI to Blogger in Draft Users, and its my turn now ;) It looks super cool!. Check out these screenshots [Click the image to get a bigger version]

0-blogger-new-dashboard

1-blogger-new-dashboard

2-blogger-new-dashboard

3-blogger-new-dashboard

4-blogger-new-dashboard

6-blogger-new-dashboard

7-blogger-new-dashboard

8-blogger-new-dashboard

9-blogger-new-dashboard

10-blogger-new-dashboard-post-editor

Check out if you have it enabled already. Just visit http://draft..blogger.com and you might see a new Dashboard. :)
Source: http://www.bloggerplugins.org/2011/06/awesome-blogger-dashboard.html

Recent Posts using Blogger Feed Widget

imageYou can use the Blogger’s Official Feed Gadget to act as a Recent Posts Widget. Here are the Steps to Do it

1. Login to Blogger Dashboard and Go to Design > Page Elements (or Layout)

2. Click the Add a Gadget Link, and Add a Feed Gadget From the Popup Window

image

3. The Feed Gadget can display a maximum of 5 posts

In the Feed URL filed, give the URL as

http://yourblog.blogspot.com/feeds/posts/summary?max-results=5

(after editing it with your Blog URL)

image

As I have a Custom Domain blog,  I would use

http://www.bloggerplugins.org/feeds/posts/summary?max-results=5

as the feed URL

4. Once the Feed is retrieved, adjust the Gadget Settings and Save the Gadget.

image

5. Now you should see the Recent Posts Widget on your Blog

image


Source: http://www.bloggerplugins.org/2011/06/recent-posts-using-blogger-feed-widget.html

Change Blogger Favicon Easily Without any Code Changes

The new Blogger Dashboard allows you to change your blog’s favicon with a few clicks. . The feature has been around for a while now and most of you might already be using it.This tutorial is for the ones who don’t

If you are not sure, what a Favicon is then refer this image:

image

The default Blogger Favicon looks like this : You can replace it with some other icon of your choice.

How to change the Blogger Favicon without any Code Edits

1. Login to your Blogger Dashboard and navigate to Design > Page Elements.

2. Click on the Edit link next  to the Favicon element

https://lh5.googleusercontent.com/k9O8N5Bjn_UJykwz0oZjyVkID28w2WzKgtxiWrfkE_1L5_jh7TBRUPKUX0jXM8LbSaAAlQ3rwX0jXtJ2kRtspuLOiYvAsGIW5nvpN_VbXbeBwh_bmCk

3. Click the Browse button and select the appropriate favicon which you already have on your computer.

image 

4. Once it is uploaded, you will see the Favicon and a Remove link next  to it. Click on the Save button

image

5. Save the Changes and you are done.

image

Common Questions

1. I changed the favicon, but it is still showing the old favicon.Why?

Just clear your browser cache, and reload your blog once or twice. It should now work.

2. Does it support only icon files?

You can use other images as well. Blogger will automatically resize them and convert them into the icon format. But the image should be less than 100kb.

3. Where can I download Favicons from?

http://www.iconspedia.com/ Just download the .ico version of the icon. You can download the 16x16 version of the icon if available. You will find lots of similar sites if you do a Google Search.


Source: http://www.bloggerplugins.org/2011/07/change-blogger-favicon-easily-code.html

Google Scribe in Blogger

Google Scribe is an Auto text completion tool which was launched in Google Labs an year ago. Google has recently added this feature to the Post Editor in its Draft version. Google Scribe helps you write more efficiently by auto completing words and phrases as you type. Google Scribe supports Arabic, Dutch, English, French, German, Hungarian, Italian, Polish, Portuguese, Russian, Spanish and Swedish and the language is automatically detected using the text in the post.


How to Enable Google Scribe in Blogger

1. Login to http://draft.blogger.com

2. In your post editor, you should see a pencil icon on the right(available only in the Compose mode). clicking this icon will enable/disable Scribe.


 and this is how the auto text completion works.. (notice the suggestion in grey)


Once Google Scribe is turned on, suggestions will appear in grey as you type.You can accept the suggestion by hitting the space bar or by keying in a punctuation mark.

3. If you would like to get more than one test suggestion at a time, then click on drop menu next to the Pencil icon, and Select "Show multiple Suggestions"


.

...and here is a screen shot of the multiple suggestion in action.


Keyboard Shortcuts

Ctrl + j - to enable/disable Scribe

Ctrl + Shift + j - to enable/disable multiple suggestions

ESC - to temporarily remove  a suggestion

TAB - to restore a suggestion.


Try scribing, and do let me know how it goes :)..


Source: http://www.bloggerplugins.org/2011/08/google-scribe-blogger-suggestions.html

Changing Blogger Mobile Template

Changing Blogger Mobile Template
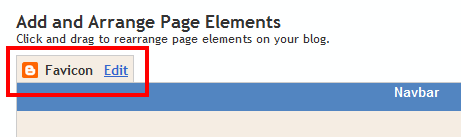
The Blogger Mobile templates is something pretty cool, and blogger provides you with 27 mobile templates to choose from. You cannot completely customize the mobile template(as of now) but you can pick any of the available templates.

All of these templates come with Post Thumbnails, and a custom excerpt rendered using the data:post.thumbnailUrl and data:post.snippet variables. These templates also support the swipe navigation. You can swipe left and right to move across pages on your Touch screen mobile

Here is a preview of how this Blog looks on a Samsung Galaxy S2

bloggerplugins.org_on_sgs2

Lets see how we can change the blogger mobile template

1. Login to Blogger in Draft : http://draft.blogger.com

2. Go to the Template Section

image

3. Click on that button below the mobile version

image

3. From the next screen you will be able to enable the mobile template, and select the template which you like. Use the dropdown and the slider to pick the perfect template

image

4. When you are done selecting the template, Click the Save button.

You might have noticed a QR code on the Template Selection Screen. Scanning this from your mobile will take you directly to the mobile version of your blog.

If you visit your blog from your mobile, you should be automatically taken to the mobile version of your blog.


Source: http://www.bloggerplugins.org/2011/08/changing-blogger-mobile-template.html

New UI on Your Blogger Dashboard

New UI on Your DashboardThe Blogger’s new UI has now migrated from Blogger Daft to the regular Dashboard.If you are a regular reader here, then you must have already seen screenshot of the new UI. Blogger has now made some improvements to  the new UI, and has plugged it into the regular dashboard.The new UI also includes an option to Edit your Template Code.

When you login to your Blogger Dashboard, you should see a notification asking you to check out the New UI.

image


If you dismissed this notification, don’t worry, you can still switch to the new UI.In your Old Dashboard, you will see a link asking you to try the new UI.

image

If you are not able to figure that out, just follow this link and you will be taken to the new UI.

Here are a few Screen Shots: (Click the image for a larger version)

Blogger Dashboard

Blogger Reading List

Blog Overview

Blog Posts

Blog Pages

Blog Comments

Blog Stats

Blog Earnings

Blog Layout

Blog Template

Edit Template HTML

Blog Settings

If you don’t like the new Interface, you can switch back to the old one.

image


Source: http://www.bloggerplugins.org/2011/09/new-ui-on-your-dashboard.html

Recent Posts Widget with Thumbnails

At least some of you would be familiar with My "Recent Posts with Thumbnails" Gadget for Blogger. I had got so many complaints that the Gadget fails to load or has some issues. So I decided to make a Widget version of the same.

Why the other Gadget fails at times?

The other gadget is made using the Gadget API. The API renders the gadget as an iFrame with all the parameters appended to the iFrame URL. When the iFrame url becomes too big, browsers have issues rendering the gadget. This primary reason behind this is that the API appends so many style parameters to the iFrame URL thereby making it pretty lengthy.The current page url is also a parameter.That is why some people complain that it is working on the home page, whereas it doesn't work on some of the post pages. The reason is that your home page url is shorter in length than your post page url. So it is almost impossible to make the gadget error free.

So What now?

This new Widget doesn’t rely on the Gadget API, and is not loaded as an iFrame. This is a plain JavaScript widget, and will work across all browsers.

What’s special about this new Widget?

If you are good at CSS, you can make the widget exactly as you want. There is no limit in customizing this Widget. This doesn’t mean that it is useful only to those who are familiar with CSS. The Widget by default will inherit your Blog’s Styling. So it should look pretty neat with the default Styling

Options in the Widget Installer

  1. Blog URL: This should be the URL of a blogger Blog. If you are installing the Widget on the same blog then you can leave this field blank . This field is useful for those who have multiple blogs..
  2. Number of Posts – The number of posts displayed in the Widget
  3. Maximum title Length – This option can be used to chop off really long Post Titles. If a post title is longer than this length, the widget will chop off the rest of the title
  4. Show Thumbnail – It’s pretty much obvious from the name
  5. Show Default Thumbnail – If this option is selected, and your post doesn’t have an image, then a default image will be displayed.
  6. Thumbnail Dimension – The gadget can generate square thumbnails of any size. Use this option to set the dimension of the thumbnail.
  7. Float Thumbnail to – This option can be used to align the image thumbnail to the left or to the right
  8. Thumbnail Margin – You can set a 5px margin to the image, so that the thumbnail stays apart from the post summary. You can override the margin by selecting No.(You can then manually style it using CSS)
  9. Show summary
  10. Summary size – If summary is more than this length, then the widget will chop off the rest
  11. Show post date
  12. Show Comment Number
  13. Show Read more Link
  14. Read More Text – This is the Text Shown on the Read More Link
  15. Use Full Feed – By default the Widget will use the Blogger Summary feed which is smaller in size. If you select the Full Feed option, it will use the Full Feed which is bigger in size, and hence the Widget would get slower. The advantage is that, you would get thumbnails of YouTube videos that you have posted.
  16. Sorting – Helps you in displaying the recently published posts or recently updated posts.

Now that you are clear with the options, use the below button to add the Widget to your Blog.

Add Recent Posts Widget

Advanced Options:

1. Default Thumbnail

If the Widget is unable to find an image in the Post and if Options 4 and 5 are checked, then the Gadget will use the following image by default

If you want to change this default thumbnail, then you will have to first upload the Thumbnail somewhere. The best place to upload is blogger. So create a new post(or edit an existing one) and add the image to the post. Now Switch to the Edit HTML view of the Post Editor. There you will find a URL which contains “/s1600/” in it. Copy that URL. Change /s1600/ to /s72-c/. So finally you will get some URL like

https://blogger.googleusercontent.com/img/b/R29vZ2xl/AVvXsEj7FMd9dkP8OQDazVTyjwp2_J3mobeb1bGOFA0QgnX2lHQ-E_liEHPRhTdf9pPEmdtI_GFa3xIsgmZaJ5TN3k0jaAzJsidonuJ0IkmpTU6vQLfZBnUOAWipI8upnabslbryIPLu_5HGIHw/s72-c/default.png

This is your default Thumbnail's URL. Now it’s time to tell the script to make use of this Image. For that Edit the HTML/JavaScript Widget(Recent Posts) and add the following variable:

var defaultImage=”THUMBNAIL_URL_WHICH_HAS_/s72-c/_IN_IT”;

(Off course you will have to edit the above line)

If you are not sure where to add the variable, then add it just before

var numberOfPosts

Save the Gadget and you are done.

2. CSS Styling:

If you are using CSS Styling, make sure that the Thumbnail Margin is set to None. You can also set the Thumbnail Float to None. This will prevent the Widget JavaScript from adding any Styles to the Post List.

You can add your CSS at Template Designer > Advanced > Add CSS

Some Sample CSS snippets are there in the comments.

3. Tracking the Widget Usage

I have appended a utm_src parameter to the recent post URLs.This will help you in tracking the widget usage from your Google Analytics account(Traffic Sources > Campaigns).

4. Remove the Powered By Link

If you can’t stand the powered by Link at the bottom of the widget, then you can hide it. To do that Add this CSS snippet :( :(

.bp_footer{display:none;}

If you don’t know how to add CSS read the CSS Styling (2) part in these Advanced Options.


Hmmm at the moment, I’m a little lazy to create a Demo Blog. You can expect that sometime soon.


If you have any doubts or questions or suggestions, feel free to comment here and I will try my best to reply to each of your comments.


I know that many bloggers are having issues in using the old Gadget. So kindly help others by sharing this new post :)


Source: http://www.bloggerplugins.org/2011/09/recent-posts-thumbnails-blogger-widget.html

Grid Layout For the Popular Posts Widget

Grid Layout For Popular Posts BloggerA few days back, I published the JavaScript version  of the Recent Posts widget, and I loved the Grid Layout of the Widget. One of the most popular Widgets used by Bloggers is Blogger’s Official Popular Post Widget. So I decided to edit the gadget, and give it the Grid Style.

How does the Gadget Look like after tweaking it?


image image

So Here are the Steps to make your Popular Posts Widget act like an Image Grid

1. Go to the Layout Page and add the Popular Posts Gadget, if you haven’t already added it.

image

2. Edit the Gadget Settings so that it displays the Thumbnails and not the Snippet

image

3. Now Go to Template/Design > Edit HTML . DO NOT Click on the Expand Widget Templates checkbox. Leave it unchecked, and look for  PopularPosts1 (Do a Ctrl +F to find it in your template) and you will get some line like this

<b:widget id='PopularPosts1' locked='false' title='Popular Posts' type='PopularPosts'/>

4. Change This line to

<b:widget id='PopularPosts1' locked='false' title='Popular Posts' type='PopularPosts'>
<b:includable id='main'>
<b:if cond='data:title'><h2><data:title/></h2></b:if>
<div class='widget-content popular-posts'>
<ul>
<b:loop values='data:posts' var='post'>
<li>
<b:if cond='data:showThumbnails == "false"'>
<b:if cond='data:showSnippets == "false"'>
<!-- (1) No snippet/thumbnail -->
<a expr:href='data:post.href'><data:post.title/></a>
<b:else/>
<!-- (2) Show only snippets -->
<div class='item-title'><a expr:href='data:post.href'><data:post.title/></a></div>
<div class='item-snippet'><data:post.snippet/></div>
</b:if>
<b:else/>
<b:if cond='data:showSnippets == "false"'>
<!-- (3) Show only thumbnails -->
<div class='item-thumbnail-only'>

<div class='item-thumbnail'>
<a expr:href='data:post.href' expr:title='data:post.title'>
<b:if cond='data:post.thumbnail'>
<img alt='' border='0' expr:height='data:thumbnailSize' expr:src='data:post.thumbnail' expr:width='data:thumbnailSize'/>
<b:else/>
<img alt='' border='0' expr:height='data:thumbnailSize' src='https://blogger.googleusercontent.com/img/b/R29vZ2xl/AVvXsEj7FMd9dkP8OQDazVTyjwp2_J3mobeb1bGOFA0QgnX2lHQ-E_liEHPRhTdf9pPEmdtI_GFa3xIsgmZaJ5TN3k0jaAzJsidonuJ0IkmpTU6vQLfZBnUOAWipI8upnabslbryIPLu_5HGIHw/s72-c/default.png' expr:width='data:thumbnailSize'/>
</b:if>
</a>
</div>
</div>
<b:else/>
<!-- (4) Show snippets and thumbnails -->
<div class='item-content'>
<b:if cond='data:post.thumbnail'>
<div class='item-thumbnail'>
<a expr:href='data:post.href' target='_blank'>
<img alt='' border='0' expr:height='data:thumbnailSize' expr:src='data:post.thumbnail' expr:width='data:thumbnailSize'/>
</a>
</div>
</b:if>
<div class='item-title'><a expr:href='data:post.href'><data:post.title/></a></div>
<div class='item-snippet'><data:post.snippet/></div>
</div>
<div style='clear: both;'/>
</b:if>
</b:if>
</li>
</b:loop>
</ul>
<b:include name='quickedit'/>
</div>
</b:includable>
</b:widget>

5. Save your Template

6. Now Go to Template Designer > Advanced > Add CSS and paste the following CSS snippet there, and apply to your Blog

.popular-posts .item-thumbnail{float:left;}
.popular-posts ul{padding-left:0px;}
.popular-posts ul li {list-style-image: none;list-style-type: none;display:inline;}

The image URL present in the Widget Code is the Default Thumbnail which will be displayed if the post doesn’t have a thumbnail associated with it. You can modify it to get a custom default thumbnail. You can spice up the CSS to make the grid look more eye catching. I would leave that to you :)

Reverting Back to the old one

If you are not satisfied by the way it looks, then revert it back. Here are the steps:

  1. Just Remove the Popular Posts Widget from the Layout Page.If you need the original version, then add it back again

  2. Remove the CSS which you added to Template Designer > Advanced > Add CSS

  3. That’s it.


I think that this Hack would work out well on Recipe and Photography Blogs. Try it out, and let me know if it is useful :)


Source: http://www.bloggerplugins.org/2011/09/grid-layout-for-popular-posts-widget.html
 
Play : Agame | Y8 Games | Y3 Games
Copyright © 2011. Blogger Tips And Tricks 2012 - All Rights Reserved

Proudly powered by Blogger