AdSense's "Ads by Google" Link Replaced By "AdChoices"


ads by google old look


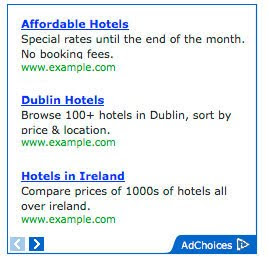
This is how they look now,

Adchoices new icon label


Adsense Ads replaced with adchoices


Personal view:

I personally think that the arrow icon will encourage users to visit the Ads more because of our natural habit of following the arrow direction. I know this would sound funny but couldn't they use a better icon? :p The Icon for me personally looks dull and bore in appearance. What do you think about this latest change? Do you think this can increase our average CTR? I would love to hear from you. Peace.

Source: http://www.mybloggertricks.com/2011/06/adsense-by-google-link-replaced-by.html

Add the Google +1 Button to Your Blogger Blogs

image


6.  If you want the button to appear below blog posts then add the button code just below <data:post.body>

    7. Save your template to see it working. Have fun! :>

It will appear like this in search results,

+1'd this

Alternative Method

Source: http://www.mybloggertricks.com/2011/06/add-google-1-button-to-your-blogger.html

7 Advantages Of Using Facebook Comments Box

3- Receive New Blog Comments Notification on Facebook

Whenever a comment is left on any of your posts you will be notified via Facebook Notification system. Same is true when a comment is liked or responded by another visitor or reader. The readers are also notified of replies made on their comments at your blog.


4- Threaded Comments

Your readers no more need to feel neglected because you no more need to reply them all at once. Rather you can pay them proper attention by replying to each reader under their comments. This way a comment thread is set up which further makes the conversation more useful and fun!

4- Comment With Profiles - No Anonymous Comments

You can now happily turn off the "Anonymous" comment option by going to Blogger > Settings > Comments . The users as I said can use any of their ID to leave a comment so you really no need to worry about who is commenting!

5- No Spam Comments Possible Now

You will get more relevant comments with no spam as users will have to use their personal IDs to leave a comment and spam robots are surely incapable of doing that.

6- Delete Comments Easily Without Leaving Window

In Blogger comment form to delete a comment you need to click the trash icon and the you are taken to a separate window where you select the option of deleting the comment permanently. But With FB comment box you Delete comments just the way you delete comments on your FB profile. With a click of a mouse!

7- All links are by default no follow

The links left on your comment box are by default tagged as nofollow and according to the FB developers search engine robots can not crawl the content of your comments as the plugin is enclosed inside a iframe where robots can not enter to crawl data. This way the quality of your content in the eyes of search engines will increase because the robots will have to crawl only the body of your posts and not the distracting comments.

What do you think now?

I shared the advantages above and tried to put forward the best advantages this widget could offer to bloggers including me. I just hope this widget could help you further increase your blog traffic and enjoy blogging even more. Have fun. :)

Source: http://www.mybloggertricks.com/2011/06/10-advantages-of-using-facebook.html

New Multi Tabbed Widget For Blogger - Editable Tabs!

MULTI-TABS-WIDGET

or this if you using any other template,

<div id='sidebar-wrapper'>

and just below the code you find, paste the following code,

<div class='tabviewsection'>

<script type='text/javascript'>
            jQuery(document).ready(function($){
                $(&quot;.tabs-widget-content-widget-themater_tabs-1432447472-id&quot;).hide();
                $(&quot;ul.tabs-widget-widget-themater_tabs-1432447472-id li:first a&quot;).addClass(&quot;tabs-widget-current&quot;).show();
                $(&quot;.tabs-widget-content-widget-themater_tabs-1432447472-id:first&quot;).show();
      
                $(&quot;ul.tabs-widget-widget-themater_tabs-1432447472-id li a&quot;).click(function() {
                    $(&quot;ul.tabs-widget-widget-themater_tabs-1432447472-id li a&quot;).removeClass(&quot;tabs-widget-current a&quot;);
                    $(this).addClass(&quot;tabs-widget-current&quot;);
                    $(&quot;.tabs-widget-content-widget-themater_tabs-1432447472-id&quot;).hide();
                    var activeTab = $(this).attr(&quot;href&quot;);
                    $(activeTab).fadeIn();
                    return false;
                });
            });
        </script>

<ul class='tabs-widget tabs-widget-widget-themater_tabs-1432447472-id'>
<li><a href='#widget-themater_tabs-1432447472-id1'>About</a></li>
<li><a href='#widget-themater_tabs-1432447472-id2'>Tags</a></li>
<li><a href='#widget-themater_tabs-1432447472-id3'>Archives</a></li>
</ul>

<div class='tabs-widget-content tabs-widget-content-widget-themater_tabs-1432447472-id' id='widget-themater_tabs-1432447472-id1'>
<b:section class='sidebar' id='sidebartab1' preferred='yes'>
</b:section>                                      
</div>                           
                               
<div class='tabs-widget-content tabs-widget-content-widget-themater_tabs-1432447472-id' id='widget-themater_tabs-1432447472-id2'>
<b:section class='sidebar' id='sidebartab2' preferred='yes'>
</b:section>                                        
</div>                           
                               
<div class='tabs-widget-content tabs-widget-content-widget-themater_tabs-1432447472-id' id='widget-themater_tabs-1432447472-id3'>
<b:section class='sidebar' id='sidebartab3' preferred='yes'>
</b:section>                                       
</div>

</div>

<div style='height:5px;clear:both;'/>


Please Replace About, Tags and Archive with your Widget Titles that you will be adding. Keep the title short.

     7.      Now Go To Page Elements. You will see something like this,

MENU-TABS-PAGE-ELEMENTS


    8.     And now comes the most difficult step... Start Adding Widgets! Have Fun =)

Source: http://www.mybloggertricks.com/2011/06/new-multi-tabbed-widget-for-blogger.html

Play Flash SWF Files In Blogger - My First Flash Movie!

PLAY-FLASH-BLOGGERPlaying a flash file in any blog or website is really easy but unfortunately we still see tutorials where a long complex code is shared whilst you can just add few lines of code to let things play. I previously shared a list of [a href="http://www.mybloggertricks.com/2009/05/free-high-quality-clocks-no-adds.html" target="_blank"]10 high quality flash clocks[/a] all embedded in our blog post and they work just fine. I will share the same code here.[a name='more'][/a] But first I guess you will enjoy a sample flash movie that I created for my [a href="http://qiyamah1.blogspot.com/2009/01/long-awaited-movie.html" target="_blank"]School class mates[/a] back in the year 2009, when I had just started learning blogging. The Following movie is surely approved for appropriate audiences! =p


To Play the flash file in full screen kindly [a href="http://www.mdn.fm/files/311609_hp0sc/shaheer1.swf" target="_blank"]click here[/a]


Adding Flash files in Blogger Blogs

To Add a flash file in blogger posts, sidebars, footers etc. just use the following simple embedding code,

<object><param name="movie" value="Add_Flash_File_Direct_Link_Here"><embed src="Add_Flash_File_Direct_Link_Here" width="300" height="300" wmode="transparent"> </embed></object>


Make these changes:

  • Replace Add_Flash_File_Direct_Link_Here with the Direct URL of your flash file. You can upload the flash file at [a href="http://www.mdn.fm/register/?r=7971" target="_blank"]Mydatanest[/a] and then you can get the link from there.
  • Make sure you keep the width and height equal to the original resolution of the flash file for better quality. By default the width and height parameters are each set to 300px in the above code.

Add the code to your posts, publish it and view your blog to see it live in action. Have Fun! :>

Source: http://www.mybloggertricks.com/2011/06/play-flash-swf-files-in-blogger-my.html

Add Facebook Comments Box To Blogger Blogs - New!


Note: If you wish to completely hide the blogger comments form then read [a href="http://www.mybloggertricks.com/2011/06/facebook-comments-box-instead-of.html" target="_blank"]Replace Blogger comments form With Facebook[/a]


facebook-comments-boxIn 2009 [a href="http://developers.facebook.com/blog/post/198" target="_blank"]Facebook developers[/a] introduced their best social plugin called "Facebook Comments Box". This plugin can be embedded in any website or blog and visitors can use their IDs of Facebook, Yahoo, AOL or Hotmail to leave a comment at your site. This plugin did show a lot of problems when it was embedded in Blogger Blogs in initial days of its development but now thanks to our fellow friend Max from [a href="http://allblogtools.com/" target="_blank"]Allblogtools[/a] this plugin has been finally bloggerized to work just perfect with any Blogger hosted blogs. I have edited Max's coding in some areas and have mentioned some more interesting options that will help you use the Facebook comments box in parallel to your old [a href="http://www.mybloggertricks.com/2009/12/customize-blogger-comment-form-make-it.html" target="_blank"]Blogger Comment form[/a] so that you may loose no previous comments and provide users with multiple options of commenting from different platforms.


[a href="http://facebook-comments-box.blogspot.com/2011/06/add-facebook-comments-box-to-blogger-in.html" target="_blank"]Live Demo[/a]


This is how the Facebook Comments box looks like,


LIGHT SCHEME

facebook-commentS-box LIGHT


DARK SCHEME

Facebook-comments-dark-scheme


Interesting? Lets now learn how to embed this extremely useful comment form in Blogspot blogs. Kindly follow the simple steps below,


1- Get a Facebook Application ID


  1. Go To [a href="http://developers.facebook.com/setup/" target="_blank"]Facebook Developers Page[/a]

  2. Submit your blog URL and give it a name. Keep Site name as your "Blog Title" and Site URL as your "blog address"


site-url

     3.   Hit "create app" button and proceed

     4.   After submitting the security check code you will see this page,

app-id

       5.   Save that App ID in a notepad because we will need that latter. Now Click the link near the top-right corner of the same page that says "Developer Dashboard"

image

      6.  One the new window that appears click the Edit Settings link ,

edit-settings

        7.  Then go to Website option and write your Site Domain as blogspot

website

       8.  Save Changes and jump to the next step of this tutorial


2- Adding the Facebook comments Box to Blogger


Now its time to do embed the comments box in your blog templates. So follow these easy steps,

PS: Please make sure your blogger comment form is embedded below posts. For doing this first go to Blogger > Settings > comments > and then choose embed comments below posts. After doing this follow the tutorial below.


  1. Go To Blogger > Design > Edit HTML

  2. Backup your template

  3. Check the "Expand Widget Templates" box

  4. Search for <html and just after it give a space and add this code,


xmlns:fb='http://www.facebook.com/2008/fbml'


  5.  Next search for 


<body>


Note: In New Blogger Designed templates the same code looks like this,


<body expr:class='&quot;loading&quot; + data:blog.mobileClass'>


Find any one of these codes and just after it paste the code given below,


<div id='fb-root'/>

<script>


    window.fbAsyncInit = function() {


    FB.init({


      appId  : &#39;YOUR_APP_ID&#39;,


      status : true, // check login status


        cookie : true, // enable cookies to allow the server to access the   session


      xfbml  : true  // parse XFBML


    });


  };

    (function() {

    var e = document.createElement(&#39;script&#39;);


      e.src = document.location.protocol +   &#39;//connect.facebook.net/en_US/all.js&#39;;


    e.async = true;


      document.getElementById(&#39;fb-root&#39;).appendChild(e);


    }());


</script>


  • Replace YOUR_APP_ID with your Facebook application ID that you saved in a notepad.


    6.    Next search for  </head> and just above it paste the following code,


<meta expr:content='data:blog.pageTitle' property='og:title'/>

<meta expr:content='data:blog.url' property='og:url'/>


<meta content='MY Blogger Tricks' property='og:site_name'/>


<meta content='BLOG-LOGO-IMAGE-LINK' property='og:image'/>


<meta content='YOUR_APP_ID ' property='fb:app_id'/>


<meta content='http://www.facebook.com/mybloggertricks' property='fb:admins'/>


<meta content='article' property='og:type'/>


Make these changes:


  • Replace MY Blogger Tricks with your blog title/Name.

  • Replace BLOG-LOGO-IMAGE-LINK with the image link of your logo. Your logo will look good if it is in gif format and having this size ->  40px by 40px . This logo will appear next to your post title on Facebook profiles of your visitors like this,


logo


  • Replace YOUR_APP_ID  with the your Facebook Application ID that you saved in notepad

  • Replace http://www.facebook.com/mybloggertricks with your Facebook user profile link


    7.    Now Search for this,


<b:includable id='comment-form' var='post'>

    8.    Just after it paste the code given below,


<b:if cond='data:blog.pageType == &quot;item&quot;'>

<div style='padding:0px 0px 0px 0px; margin:0px 0px 0px 0px;'><script src='http://connect.facebook.net/en_US/all.js#xfbml=1'/>


<div> <fb:comments  colorscheme='light' expr:href='data:post.url' expr:title='data:post.title' expr:xid='data:post.id' width='520'/></div>


<div style='color:#fff; background-color:#3B5998;border: solid 1px #ddd; font-size:10px; padding:3px; width:510px;'>Facebook Blogger Plugin: Bloggerized by <b><a alt='blogger templates' href='http://www.allblogtools.com/' style='text-decoration:underline; color:#fff;' target='_blank' title='blogger templates'>AllBlogTools.com</a></b> Enhanced by <b><a alt='blogger widgets' href='http://www.mybloggertricks.com/' style='text-decoration:underline; color:#fff;' target='_blank' title='Blogger Widgets'>MyBloggerTricks.com</a></b></div></div>


</b:if>


  • If you want to use the dark scheme then simply replace light with dark

  • To change the Comments box size, change this value width='520'

  • To change the footer credits size, change this value width:510px

  • Keep a difference of 10 pixels between the box size and footer size. For example if you set box-size to width='600' then set footer-size to width:590px


      9. Save your template and Bingo you are Done! See your blogs to find a beautiful comment box waiting to be touched. =)


Respect Copyright


This plugin contains credits to allblogtools and MBT blog for the efforts put by us in facilitating blogger users with this great commenting plugin. We therefore request you to please do not remove the footer credits. The credits are attached to the plugin in a design style that it perfectly blends the colour themes of Facebook Comments Box. We only need this favour in return.


Need More Fun?


If you want to further play with codes and wish to give a Facebook style (i.e font colours, background colors, background image) to your old blogger comments form then read the post below,


  • [a href="http://www.mybloggertricks.com/2009/12/customize-blogger-comment-form-make-it.html" target="_blank"]Customize Blogger Comment Form![/a]


Troubleshooting


If you faced any problem then kindly do not hesitate to let me know. It would be a pleasure to be at your service. I will write more tutorials on this topic this week so that you may get all the latest updates. I hope this plugin proves useful to most of you and it may bless your blogs with even more organic traffic. Peace! :>
Source: http://www.mybloggertricks.com/2011/06/add-facebook-comments-box-to-blogger.html

Why Should You Use "Windows 7" in 2011?


WINDOWS-7-USE-REASONS1As time goes by, the world is developing with a rapid pace and it has become significant for us to cope up with the running world. In this growing pace the use of computer is obviously inevitable and have become clinical.So one would always go for better and more composed computer system, thus the importance of using windows 7 can be depicted with this regard. Therefore for the betterment we have to have something good and convenient for the users and something which saves our time, as its the battle of time,so people behind Microsoft being familiar of this have launched there new operating system i.e Windows7 to meet the needs of their users in 2011. There could be many reasons that why we would go for windows 7, why cant we rely on XP or Vista? This question will have to be answered with many reasons. But first, I would discuss some of my personal experience as follows:


1- Brilliant Search Functionality


Being a user itself,what I have found good about windows 7 is that it has a very good search bar.when you have your hard disk filled,you cant remember the location of your particular file which you have saved,you would go for the search option,which could make your work easier,it doesn't take long to search the required file in windows 7 as what hasn't been the case with the former operating systems,when you go for a file search in XP,it takes so long that you end up looking for that particular file by going through the drives yourself and that cartoon which flashes in XP also annoys you like anything. It saves ample of time doing a search on windows 7


2-  Support High Graphics Games


Nowadays,games with high graphics are coming which need a good operating system to be run on,so in windows 7,I can play heavy games and it doesn't effect much to the speed of the computer having installed such games.


3- Takes less time to start and shutdown


It has a good restart, log off and shutdown time,XP takes long where as it takes lesser time.


4- User Friendly Interface


It has a good interface and have good default programs like word pad,calculator,windows media player with a great new skins and etc. It is more user-friendly,it has a front row option which compiles all your music,photos and relevant stuffs in a single format and anyone can access to it easily


5- Last Media and Software


The new internet explorer 7 is also good and almost all the latest version websites are supported by this browser. All Latest software are available like Microsoft office, windows media player11, graphic cards, drivers etc.


6- Strong Virus Combat Support


The system is not easily infected with virus. You can run your system without installing massive antivirus Software and this saves a lot of hard disk capacity. Its firewall is efficient enough to say no to VIRUSES.


7- Efficient in running multiple programs


Windows 7 has key performance improvements to take up less memory and run background services only when you need them. It's designed to run your programs faster and to sleep, resume, and reconnect to wireless networks quicker. And with 64-bit support, you can take full advantage of the latest in powerful 64-bit PCs


8- Good Network Support Options


Connecting to wireless networks on your laptop is easy and formerly a bit of a hassle now takes just a couple of clicks. Choose from the list of available networks in the task bar, click one, and then connect. Once you've connected to a network, Windows will remember it so you can connect again later automatically.


I hope this little post would help you guys in believing that why windows 7 has become important to use now. We can work something out with the old operating systems but everyone would go for the better option and it is clearly addressed which one holds better these days. I have tried to bring that information and knowledge to you people that tells you the basic differences of windows 7 over other OS rather than being too technical. I hope you guys find it worth reading.


 eHAB-KHANEhab Khan


About the Guest Author:

Ehab is an Undergraduate Student, pursuing his B.E Degree in Civil Engineering. He is a 21 years old pationate young boy who loves to write and share his thoughts. You can always contact him at [a rel="nofollow" href="http://www.facebook.com/profile.php?id=591336819" target="_blank"]Facebook[/a]


Source: http://www.mybloggertricks.com/2011/06/why-should-you-use-7-in-2011.html

Compress CSS and HTML To Speed Up Site Load Time Part 1

CSS Compression:

Part 2

To read the remaining part of the tutorial guide kindly click the link below,

  • [a href="http://www.mybloggertricks.com/2011/06/compress-images-and-javascript-to.html" target="_blank"]Compress Images and JavaScript To Speedup Site Load Time  Part 2[/a]

If you find any other good/better services, or have any questions or concerns, please leave a [a href="#comments"]comment below[/a]! That’s it for part 1! I hope you have fun improving the load time and speed of your site or blog(s)!  :>

Anims


About the Guest Author:

Anims is freelance web designer and enjoys playing around with and learning coding in his free time. He likes to write about Web Technologies such as HTML, CSS and SEO.

Source: http://www.mybloggertricks.com/2011/06/compress-css-and-html-to-reduce-site.html

Compress Images and JavaScript To Speed Up Site Load Time Part 2

Image Compression


My next step is to compress my images. Save all of your blog’s images into one folder, and go to [a href="http://www.smushit.com/ysmush.it/" target="_blank"]Smush it.[/a] This is an image compressing tool made by Yahoo. Upload all of your images, where they will be compressed, and download them in a zipped file. You can then re-upload them to your blog. Both techniques shown so far will decrease your page size and loading time by at least 30%.


JavaScript Compression


Your next step is to compress all of your JavaScript. Please go to [a href="http://jscompress.com/" target="_blank"]JS Compress[/a]. Upload your JavaScript, have it compressed, and re-upload it to your webpage.


Conclusion:


We have covered all of the major aspects of reducing page size. There are more minute things however, which are covered in the web apps and MBT post listed below.

  • [a href="http://www.mybloggertricks.com/2009/11/11-useful-tips-to-reduce-your-blog-load.html" target="_blank"]12 tips to reduce your blog's loading time.[/a]


If you really want to take it to the next step, then you can download [a href="http://developer.yahoo.com/yslow/" target="_blank"]Y Slow[/a], which is an app by yahoo, which analyses how speed optimized your webpage is, and tells you how to reduce your loading time.
Another website to check your loading speed is [a href="http://www.pingdom.com/" target="_blank"]Pingdom Tools[/a], or just using Google Webmaster Tools.

If you find any other good/better services, or have any questions or concerns, please leave a [a href="#comments"]comment below[/a]! Hope this little help proves helpful to must of you. :>

Anims


About the Guest Author:

Anims is freelance web designer and enjoys playing around with and learning coding in his free time. He likes to write about Web Technologies such as HTML, CSS and SEO.

Source: http://www.mybloggertricks.com/2011/06/compress-images-and-javascript-to.html

No Edit HTML Option In New Blogger Dashboard 2011?

Solution:

You can find an interesting trick of accessing the Edit HTML Page here -> [a href="http://www.mybloggertricks.com/2011/06/no-edit-html-option-in-new-blogger.html" target="_blank"]Access Edit HTML[/a]

So its highly advised to Blogger active users to kindly use the Tested version of Blogger i.e [a href="http://www.Blogger.com" target="_blank"]www.Blogger.com[/a] and not the Beta version. You can still design and edit your layouts with complete rights to edit the CSS, HTML. You can still add JavaScript and cool jQuery tricks to your blog and of course you can continue playing around codes as you always loved to do. I am as curious as you in finding updates related to this new question. I will keep you updated with all latest developments. Till then keep blogging and keep using our only beloved blogging platform, The Google Blogger! :>

Source: http://www.mybloggertricks.com/2011/06/no-edit-html-option-in-new-blogger.html

Anyone Can Earn Online and Be a Blogger, Just Go For it! Part 1

I just hope you liked the idea above and I would soon publish the remaining part of this topic.

 asjadwallAsjad Azeem


About the Guest Author:

Asjad is an Undergraduate Student, pursuing his B.E Degree in Computer and Information System Engineering. He loves to write and share his ideas during leisure time. Apart from techy stuff, he also enjoys writing Fiction. He takes programming as his favourite subject. You can always contact him at [a href="mailto:asjad.azeem@yahoo.com"]YAHOO![/a]

Source: http://www.mybloggertricks.com/2011/06/anyone-can-earn-online-and-be-blogger.html

How To Find the "Edit HTML" Option in New Blogger Dashboard?

      4. Copy that blog ID number and save it in a notpad

      5. Then paste your BLOG ID just after this link,

http://draft.blogger.com/html?blogID=


  The link will now look something like this (containing your BlogID number at the end)

http://draft.blogger.com/html?blogID=26378268362836


      6.  Finally paste your link in the browser and hit enter. You have now successfully accessed the EDIT HTML PAGE. Enjoy! :>

access-edit-html

Source: http://www.mybloggertricks.com/2011/06/how-to-find-html-option-in-new-blogger.html

Design a Professional Looking "About Us" Page


3.  Now you need to add some rows/paragraphs where you can talk about your services, goals etc. I would advise that you create at most two-three rows and keep them short in length. Use passive voice and avoid using "I am this and that" rather use a tone that may sound as if someone else is describing the author.  Once you have written down the paragraphs then start enclosing each paragraph one by one between this code,

<div style="border: #686868 5px solid; padding: 10px; -moz-border-radius: 15px; -webkit-border-radius: 15px">
  <div style="text-align: justify"><img style="display: inline; float: right" align="right" src="ADD IMAGE LINK HERE" width="128" height="128" /></div>

  <div style="text-align: justify"><font color="#666666">

ADD PARAGRAPH TEXT HERE

</font></div>
</div>

<div style="text-align: justify">&#160;</div>


Do it for each paragraph. For example if you have written three paragraphs then enclose them in the codes like this,

<div style="border: #686868 5px solid; padding: 10px; -moz-border-radius: 15px; -webkit-border-radius: 15px">
  <div style="text-align: justify"><img style="display: inline; float: right" align="right" src="ADD IMAGE LINK HERE" width="128" height="128" /></div>

  <div style="text-align: justify"><font color="#666666">

ADD PARAGRAPH-1 TEXT HERE

</font></div>
</div>

<div style="text-align: justify">&#160;</div>


<div style="border: #686868 5px solid; padding: 10px; -moz-border-radius: 15px; -webkit-border-radius: 15px">
  <div style="text-align: justify"><img style="display: inline; float: right" align="right" src="ADD IMAGE LINK HERE" width="128" height="128" /></div>

  <div style="text-align: justify"><font color="#666666">

ADD PARAGRAPH-2 TEXT HERE

</font></div>
</div>

<div style="text-align: justify">&#160;</div>


<div style="border: #686868 5px solid; padding: 10px; -moz-border-radius: 15px; -webkit-border-radius: 15px">
  <div style="text-align: justify"><img style="display: inline; float: right" align="right" src="ADD IMAGE LINK HERE" width="128" height="128" /></div>

  <div style="text-align: justify"><font color="#666666">

ADD PARAGRAPH-3 TEXT HERE

</font></div>
</div>

<div style="text-align: justify">&#160;</div>


Make these changes:

  • To change the border color of the paragraph edit #686868  with your preferred color choice. Use our [a href="http://www.mybloggertricks.com/2008/01/color-code-generator-and-color-wheel.html" target="_blank"]color generator tool[/a].
  • Replace ADD IMAGE LINK HERE with the URL of your image. Try to you use a small image 128px by 128px in size.
  • To adjust the image size edit width="128" and height="128"

    4.    Finally save your page and publish it. Visit your About Us page to see it in action! :>


Hide Widgets

Now we need to hide all widgets that appear below post titles and at the bottom of posts. These widgets are normally the social bookmarking icons, AdSense code and related post widget which appears on all your posts. To hide them kindly follow these steps,

  1. Go To Blogger > Design > Edit HTML
  2. Backup your template
  3. Check the "Expand Widget Templates" box
  4. Search for ,

<data:post.body/>

and just above it enclose all your widget codes between the code below,

<b:if cond='data:blog.url != "ADD YOUR ABOUT US PAGE URL HERE"'>

WIDGET CODES

</b:if>


Add all your widget codes between these two bolded lines. Replace ADD YOUR ABOUT US PAGE URL HERE with your About Us page link.

    5. Do the same for all the widget codes below <data:post.body>

    6. Finally save your template and visit your blog to see the page loading in seconds with a neat and clean look.


Need Help?

If you needed any help just feel free to post your queries. I will reply the earliest possible. I just hope you succeed in creating an attention seeking About Us page that may let your blog stand out! Have fun. :>

Source: http://www.mybloggertricks.com/2011/06/design-professional-looking-us-page.html

Add +1 button and Other Share Buttons Below Post Titles

<!-- AddThis Button BEGIN -->
<div class="addthis_toolbox addthis_default_style ">
<a class="addthis_counter addthis_pill_style"></a>
</div>
<script type="text/javascript" src="http://s7.addthis.com/js/250/addthis_widget.js"></script>
<!-- AddThis Button END -->

</td>


</tr>
</table> </b:if><br/>

    5.   Next search for </head>

    6.  and just above it paste the following code,

<script src='http://apis.google.com/js/plusone.js' type='text/javascript'> {lang: &#39;en-US&#39;} </script>

    7.  Save your template and you are done!

Source: http://www.mybloggertricks.com/2011/06/add-1-button-and-other-share-buttons.html

How To Style BuySellAds Empty Ad Spots With CSS?


Customize-BSA-adsBuySellAds is a name that is known to all. It is an advertisement service where you can buy and sell ads out of thousands of blogs and websites. Ads are displayed in different format sizes, the most popular being 125 by 125 and 468 by 60 and 300 by 250. By default the empty Ad Posts look dull and grey in color just like these,


468 by 60

125 by 125

I am sure no one would like the default look so lets play with some CSS!


Customizing BSA Ad Spots


Whether you are a blogger user or wordpress or a webpage holder, this tutorial works for all. We just need to add the CSS code to our style sheet and that's it. So follow up,


  1. Go To Blogger > Design > Edit HTML

  2. Backup your template

  3. Search for

  4. and just above paste the code below,


.adhere{ background:#ffffff !important; border-color:#B7DBFF !important; }

.adhere:hover{ background:#EAF5FF !important; }

    5.   Save your template and you are done!

View your webpage to see your Ad spots with a more attractive look as shown below,

Active Mode Look:

customized bsa ad spot

Mouse Hover Look:

image

You can observe clearly how the ad spot changes color when the mouse cursor is hovered on it. So lets customize the colors.

Make these changes,


  • To Change the border color, kindly change #B7DBFF . Our Color Generator tool or Color Chart can be helpful.

  • To Change background color in active mode, kindly change #ffffff

  • To change background color in Mouse Hover mode, kindly change #EAF5FF


That's All! :>

PS: To change the Advertise Here font style and color. Kindly edit it from your [a href="http://buysellads.com/" target="_blank"]BSA account[/a].
Source: http://www.mybloggertricks.com/2011/06/how-to-style-buysellads-empty-ad-spots.html
 
Play : Agame | Y8 Games | Y3 Games
Copyright © 2011. Blogger Tips And Tricks 2012 - All Rights Reserved

Proudly powered by Blogger