Add Twitter Follow Button to Blogger Blogs

twitter follow buttonTwitter follow button has started gaining great attention from blogosphere. More and more blogs are adding it just near the post titles or on top sidebar to increase the number of their twitter followers and indirectly increase their pageviews. This button is an official button created by twitter developers and does not belong to a third part. As opposed to the retweet button this button loads quickly and doesn't disturb the load time of your website.

[a name='more'][/a]


Adding Twitter Follow button to Blogspot Blogs

To add the button to the widget section of your BlogSpot blogs i.e. Sidebars, below or above Post body, header etc. then do this

  1. Go to Blogger > Design
  2. Choose HTML/Javascript Widget
  3. Paste the following code inside it and drag the widget to add your button to any location you want

<a href="http://twitter.com/mybloggertricks" class="twitter-follow-button">Follow @mybloggertricks</a>
<script src="http://platform.twitter.com/widgets.js" type="text/javascript"></script>


Replace mybloggertricks with your twitter user name

    4. Save your widget and you are done!

Add Twitter Follow Button Below Post titles

If you wish to add the button below post titles then do this,

  1. Go To Blogger > Design > Edit HTML
  2. Backup your template
  3. Check the "Expand Widgets Template" box
  4. Search for this code,

<data:post.body/>

     5.   Just above it paste the following code,

<a href="http://twitter.com/mybloggertricks" class="twitter-follow-button">Follow @mybloggertricks</a>
<script src="http://platform.twitter.com/widgets.js" type="text/javascript"></script>

Again make sure to replace the green text with your twitter username.

     6.   Save your template and you are done.

Add Twitter Button To The Bottom Of Every Posts

To add the follow button below all posts on your blogger blogs then repeat the same steps and instead of adding the code above <data:post.body/> add the twitter code below it. That's it!

If you faced any problem just let me know. I will publish another post that will let you fully style and customize the button. Stay tuned.

Source: http://www.mybloggertricks.com/2011/07/add-twitter-follow-button-to-blogger.html

Customize Twitter Follow Button In 7 ways!

Now to make customization changes add the following codes (given below) just before the highlighted yellow text to make the effects take place.

1) To Change the button color you have two choice blue or grey. The blue one is the default one and the grey color is the one that I am using.

twitter grey color

data-button = "grey"

PS: With the grey color you will not be able to see the followers count because its color is automatically changed to white.  So read below..

2) To change the text color use this code,

twitter text color

data-text-color = "#000000"

To change the hexadecimal color use our [a href="http://www.mybloggertricks.com/2008/01/color-code-generator-and-color-wheel.html" target="_blank"]color generator tool[/a]


3) Add this code to change link color,

twitter link color

data-link-color = "#000000"

Again replace the 6 digit hexadecimal code with a color of your choice


4) To Hide the followers count number, use this code,

twitter followers count

data-show-count="false"

If you wish to show counts again then simply change false to true


data-lang="ja"

Simply replace ja with any language code you want.


6) You can adjust the width of the follow button in pixels or percentage using the following code,


data-width="300px"

The default width is 300px. You can increase or decrease it. The default dimensions for the follow button are 300px by 20px


7)  You can also align the plugin to left or right just like the float property by using this code,

data-align="right"

You can float the button to either right or left.


Combined Customized code:

The following code will put the important effects in a single button,

customized twitter button

<a href="http://twitter.com/mybloggertricks" data-lang="de" data-text-color = "#0080ff"  data-link-color = "#289728" data-button = "grey" class="twitter-follow-button">Follow @mybloggertricks</a>
<script src="http://platform.twitter.com/widgets.js" type="text/javascript"></script>

You can add your required codes in the similar manner as shown in the above code.

Any Questions?

You can also visit the [a href="http://dev.twitter.com/pages/follow_button" target="_blank"]developers page[/a] for more info. If you wish to add this button to your blogger blogs then you may read this post:

  • [a href="http://www.mybloggertricks.com/2011/07/add-twitter-follow-button-to-blogger.html" target="_blank"]Add Twitter Follow button to Blogger[/a]

I hope you find it easy and useful to implement. If you have any questions then you are most welcomed to ask for any help if needed by posting your questions in the [a href="#comments" rel="nofollow"]comments box[/a].

Source: http://www.mybloggertricks.com/2011/07/customize-twitter-follow-button-in-7.html

Create Custom Facebook Tab With Custom Icon (1)


To read part 2 then click this link "[a href="http://www.blogger.com/"]Design Welcome Page For your Facebook Fan Page[/a]"


Custom-Facebook-tabThis is part one of our tutorial series on "How to create a [a href="http://www.mybloggertricks.com/2011/07/create-design-custom-tabs-on-facebook.html" target="_blank"]Welcome WebPage[/a] on Facebook". To add branded look to your Fan Pages you need a custom tab so that you could then design the tab to blend your website theme. A tab is basically a link that will appear under the wall and info tabs. On clicking the tab your visitors or fans will be able to see the content inside that tab page.

[a name='more'][/a]


[a href="https://www.facebook.com/pages/My-Blogger-Tricks/147104632016744" rel="nofollow" target="_blank"]Live Demo[/a]


Follow these easy steps,


1. Set Up New Facebook Tab App


Kindly Visit [a href="http://www.facebook.com/developers/apps.php" rel="nofollow" target="_blank"]Facebook Apps Page[/a] and then click the + Set Up New App button.


set up new app


Set the App Name with either your website name or blog name. You can give any name you want and you can change it later too.


app name


Click the the Create App button and enter some security code to proceed further.


2. Configure your Tab App Settings


In the About section, click the "Change you icon" link to upload a 16px by 16px Icon for your tab. My advise is that you upload your website logo like I have done,


change-FB-icon


Before you save your changes, click the Facebook Integration tab. On the Facebook Integration settings page fill up the blanks using the information below. Make sure you note down your Application ID as shown in the screenshot below,


Canvas Page - It is optional. Just write your blog name here.


In each process below, replace YOURAPPLICATIONID with your Application ID


Canvas URL - Enter http://YOURAPPLICATIONID.iframehost.com/


Secure Canvas URL - Enter https://YOURAPPLICATIONID.iframehost.com/


Tab URL - Enter http://YOURAPPLICATIONID.iframehost.com/tab


Secure Tab URL - Enter https://YOURAPPLICATIONID.iframehost.com/tab


IFrame Size - Choose Auto-resize


FACEBOOK-INTEGRATION


Click the Save Changes button. Congratulations you just created a tab successfully! Now just few more steps.


3. Add your Custom Tab App to your Fan/Like Page


Copy your API key and App Secret code and keep them safe in a notepad as we will be needing them later. Now click the Application Profile Page link.


Add-Tab-to-Like-Page


Next click the Add to My Page link to install the page tab


add-to-my-page


Finally select the page you would like to install the tab on.


adding-iframe-tab-to-facebo


4. Visit Your Facebook Custom Tab Page


You will now find the custom tab appearing under the wall and info tabs. Click your Tab. When you visit the tab page for the first time, you will be asked to enter your API Key and APP Secret. Simply fill up the blanks with the App number codes you saved  in a notepad.


facebook-api-key


5. You are now Ready To Design your Welcome Page!


After completing a normal formality, you will now see [a href="http://woobox.com/" target="_blank"]Woobox's[/a] beautiful WYSIWYG Editor just like your Blogger Editor, where you can create amazing designs using your imagination. This is the end of tutorial part -1. On my next tutorial I will be sharing how can you design the Welcome landing page with CSS, HTML and JavaScript. Make sure you don't miss any part by subscribing to our [a href="http://feedburner.google.com/fb/a/mailverify?uri=tntbystc" rel="nofollow" target="_blank"]free email updates[/a]. The fun is yet to begin! Peace out. :d


WYSIWYG Editor

PS: Keep all settings default.
Source: http://www.mybloggertricks.com/2011/07/create-custom-facebook-tab-with-custom.html

How To Arrange Tabs Order In New Facebook Layout?


Note that you can not move the tabs up the default Wall and Info tabs. The tab arrangement can be done on for all facebook tabs or your custom tabs except the two mentioned. I hope this little info may prove helpful to most of you. You can read the tutorial series on how to create an IFRAME tab on facebook below,

  • [a href="http://www.mybloggertricks.com/2011/07/create-custom-facebook-tab-with-custom.html" target="_blank"]Create Custom Facebook Tab[/a]
Source: http://www.mybloggertricks.com/2011/07/how-to-arrange-tabs-order-in-new.html

How to Join Google Plus? and Who Can Join It?


Want to customize the color scheme of G+ and  change its look completely? Try this: [a href="http://www.mybloggertricks.com/2011/07/customize-google-plus-14-ways-to-change.html"]10 Tricks to customize Google+ Theme[/a] [a href="http://bloggingehow.blogspot.com/" rel="nofollow" target="_blank"][/a]


[a href="https://blogger.googleusercontent.com/img/b/R29vZ2xl/AVvXsEgfJAr_Ypu-WiUg48ZzaYdyNF71UelPL2DnqRadc11gdaiJJp0MmRjREuGoGV1UZ7y6BJGbImbBGvV5B_6UHn7-lt7d-ePDS7F7gjr4gX0fJ6a_0fWyGnymjkoHIFunMdTfkFxPTOK49mI/s1600/google+plus+one+1.png"]google plus logo[/a][a href="http://plus.google.com/" target="_blank"]Google Plus[/a] (+) project seems to be one of the greatest creation of Google all time. Google has really changed the way one can surf net and now with plus one, the limits are set to endless. As i was impatient to get to see the new bloggers layout in the same way i cant get hold of my self to use Google Plus one. 

Presently Google isn't allowing to join or sign up for Google plus one openly as its in testing process, though invitation process is going on. You can post your Gmail ID in the comments box below and we can invite you as a free favor. For invitation kindly first subscribe by submitting your email ID by [a href="http://feedburner.google.com/fb/a/mailverify?uri=TntByStc&loc=en_US" rel="nofollow" target="_blank"]clicking here[/a]


Some thanksgivings:


google Plus Invitation


At this point if you don't have any idea about  Google plus one i would  recommend you to get a [a href="http://www.google.com/+/demo/"]tour of it[/a].


[a href="https://blogger.googleusercontent.com/img/b/R29vZ2xl/AVvXsEhr4oyWmA3jqiixp0suY-uNTlzFUpgNDAFVqp_gXFKDGFsbXPj9RzprW43bOtRa-5rdNoLrIuYgXOg0tObBxy8wSQaYYtKbQeCPNlkv0eMIj6bmAYyNwBT7YX4kAd37uca6xXVs9axvvX4/s1600/google+plus+one.png"]google plus [/a]


You can [a href="https://services.google.com/fb/forms/googleplusenuk/"]get registered[/a] and get in queue by providing your email address. Google plus one is generally for every Google user and is basically a social networking project that would help connect people in a better way. Many of us are already annoyed with Facebook privacy issues where we don't want to share every thing with every one in our friend list. 
Google plus one has got over that issue and have introduced 'circles'. Its a worth using social  platform and i would definitely recommend over Facebook. That was a general idea of Google plus one project. Ill keep you posted with further Google plus one development.
What do you think about this new development from Google. Do you think it can attract Facebook diehard users?


Guest Post by Hassam Ahmad Awan From [a href="http://bloggingehow.blogspot.com/" rel="nofollow" target="_blank"]Bloggingehow[/a]

Source: http://www.mybloggertricks.com/2011/07/how-to-join-google-plus-and-who-can.html

How To Invite Friends In Google Plus & Create Circles?


Hope this little info proves helpful to most of you. Have fun. Peace out! :)

Source: http://www.mybloggertricks.com/2011/07/how-to-invite-friends-in-google-plus.html

How To Mention a Friend name in Google Plus?

How to Mention Multiple People Names on Google Plus?

To Mention multiple names simply keep on adding there names in the post box as you normally do on other social networks either with the @ symbol or + Symbol. If your friends are registered members then there names will appear hyperlinked as shown below,

Multiple mention

And if they are not registered members then there names will appear without hyperlinks i.e simple text as shown below,

mentioning names in google+


Hope this new method of mentioning your closest ones may seem helpful for most of you. Have fun Googling the new way! :d

If you would like to know more on Google Plus tutorials then kindly read these:

  • [a href="http://www.mybloggertricks.com/2011/07/how-to-join-google-plus-and-who-can.html" target="_blank"]How to join Google+[/a]
  • How to [a href="http://www.mybloggertricks.com/2011/07/how-to-invite-friends-in-google-plus.html?showComment=1310072514376#c5769527729751586414" target="_blank"]find and Invite[/a] Friends in Google+
Source: http://www.mybloggertricks.com/2011/07/how-to-mention-someone-in-google-plus.html

Blogger Draft's Updated Interface Now Available for All Users

Some Areas Still In Progress


There is a lot that you can explore for yourself. Just log into [a href="http://Draft.Blogger.com" target="_blank"]Draft.Blogger.com[/a] and take the fun ride.

What are your views on this?

I personally still use the full and polished version instead of the draft version. I am much comfortable with the old look and don't want it to change. What are your views on these latest design developments. Are you now more relaxed with the new options? Has it succeeded in saving your time?

If you wish to see a video for the features introduced in 2011 and how successful Blogger is today then watch this:

  • [a href="http://www.mybloggertricks.com/2011/03/amazing-google-blogger-features-look-in.html" target="_blank"]2011 Amazing Features![/a]
Source: http://www.mybloggertricks.com/2011/07/blogger-draft-updated-interface-now.html

Download Google+ App For Android 2.1 & Up

[a href="https://market.android.com/details?id=com.google.android.apps.plus" target="_blank"]Install Google+ For Android[/a]

About  Google Plus App:

Updated: June 28, 2011
Current Version: 1.0.2
Requires Android: 2.1 and up
Size: 2.7M
Price: Free!

Features Screenshots

A nice and clean user friendly dashboard.

Google

See comments on things you share may that be photos, quotes, videos or links.

Google  comments


Google+ lets you connect your [a href="http://www.mybloggertricks.com/2011/07/how-to-invite-friends-in-google-plus.html" target="_blank"]circles[/a] and decide a meeting place for a party, outgoing, special occasion or any other event you may wish to participate in.

Google  event


Instant Upload automatically uploads videos and photos to your  private album in the cloud, to make sharing a snap. Your don't have to wait for hours for the images to get uploaded any more.

Google  photos


You can easily share your thoughts with the clean mobile interface and give status updates with the touch of a screen.

Google  share your thoughts


Google  status updates

More than one Million downloads have already been made. Make sure you install this latest version of Android App for your new social networking account.

Google Plus is still in development mode and not everyone can join it. If you wish to join and receive a free invitation then read this post,

  • [a href="http://www.mybloggertricks.com/2011/07/how-to-join-google-plus-and-who-can.html" target="_blank"]Receive Google+ Free Invite[/a]
Source: http://www.mybloggertricks.com/2011/07/download-google-app-for-android-21-up.html

Reply Google+ Notifications & Update Status From Gmail! How To?

Clicking the red notification count button will display the new thoughts as shown below,

Google Plus notifications

Simply click a notification just like you do in Facebook and you can then read your friends comments and views and at the same time you can reply them without leaving Gmail,

replying to notifications


Just hit the green button "Post Comment" and shoot your replies, views at your friends! That's it!


How To Share Stuff on Google+ From Gmail?

The method is exactly the same. This time click the green "Share" button on the Google bar and say your heart out! :>

Share Posts on Gmail

You can try these interesting Google + tutorials also:

  • How To [a href="http://www.mybloggertricks.com/2011/07/how-to-mention-someone-in-google-plus.html" target="_blank"]Mention someone in Google+[/a] ?
  • [a href="http://www.mybloggertricks.com/2011/07/download-google-app-for-android-21-up.html" target="_blank"]Google+ App For Android[/a]
Source: http://www.mybloggertricks.com/2011/07/reply-google-notifications-update.html

PageRank is Not Important Says Google 2011

Unless you have quality content both your PR and Alexa are useless. Because with quality content you get lifetime quality organic Traffic. There are many blogs and websites with PageRank 6.0 in Buysellads directory yet they are not even earning a penny because they spent there great skills on ranking alone and under-estimated the value of good posts, content and shares and as a result ended their careers with hopelessness. My short personal experience says that if there is anything that matters more is Traffic. Writing on things that attract people is what I call blogging.

Below is a video by Google Software Engineer matt cutts where he is answering a question on Why aren't the Google Toolbar PageRank values updated more often? In the same video you will find the answer where he confirms that content is more important than PageRank.

Source: http://www.mybloggertricks.com/2011/07/pagerank-is-not-important-says-google.html

10 Ways To Create Buttons With CSS


Customize The Button Styles

To change the look and feel of the buttons below then kindly make these changes:

  • Edit .MBT-Buttons To Change background, border and font colors in Active mode
  • Edit .MBT-Buttons:hover To Change background, border and font colors when a user hovers mouse cursor on the button
  • Edit .MBT-Buttons a To change the link color 
  • Edit .MBT-Buttons a:hover To change the link color on mouse hover

You can use the [a href="http://www.mybloggertricks.com/2008/01/color-code-generator-and-color-wheel.html"]Color Generator Tool[/a] For changing colors.  For any help if needed just post your query in the comments box. It would be no less than a pleasure to help you along.

CSS Code For Buttons

You can use the CSS buttons below for turning [a href="http://www.mybloggertricks.com/2009/08/releasing-gorgeous-mbt-social-media.html" target="_blank"]social network[/a] links, [a href="http://www.mybloggertricks.com/2009/09/attractive-read-more-button-images-for.html" target="_blank"]read more blog links[/a],  RSS links, Profile Links, any link you want into a Button. Have Fun! :>

Button#1:

CSS button

CSS button

.MBT-Buttons{
background:#fff;
text-align:right;
cursor:pointer;
color:#E22400;
margin:5px 0;
float:left;
border:3px solid #E22400;

padding:5px;
font:bold 11px sans-serif;
}
.MBT-Buttons:hover{
background:#E22400;
font:bold 11px sans-serif;
color:#ffffff;
}

.MBT-Buttons a {
color:#E22400;
text-decoration:none;
}

.MBT-Buttons a:hover { 
text-decoration:none;
color:#fff;
}

Button#2:

CSS button

CSS button

.MBT-Buttons{
background:#fff;
text-align:right;
cursor:pointer;
color:#25448B;
margin:5px 0;
float:left;
border-bottom:3px solid #25448B;
border-top:3px solid #25448B;

padding:5px;
font:bold 11px sans-serif;
}
.MBT-Buttons:hover{
background:#fff;
font:bold 11px sans-serif;
border-bottom:3px dotted #25448B;
border-top:3px dotted #25448B;
}

.MBT-Buttons a {
color:#25448B;
text-decoration:none;
}

.MBT-Buttons a:hover { 
text-decoration:none;
}


Button#3:

CSS button

/*---------------- Rectangle left border-----------*/
.MBT-Buttons{
background:#fff;
text-align:right;
cursor:pointer;
color:#009999;
margin:5px 0;
float:right;

border-right:2px solid #009999;
border-left:10px solid #009999;
border-bottom:2px solid #009999;
border-top:2px solid #009999;

padding:5px;
font:bold 11px sans-serif;
}
.MBT-Buttons :hover{
background:#fff;
font:bold 11px sans-serif;
color:#006B6B;

border-right:2px dotted #009999;
border-left:10px solid #006B6B;
border-bottom:2px dotted #009999;
border-top:2px dotted #009999;
}

.MBT-Buttons a {
color:#009999;
text-decoration:none;
}

.MBT-Buttons a:hover {
color:#009999;
text-decoration:none;
}

Button#4:

CSS button

/*-------------- Pink Left right -----------*/
.MBT-Buttons {
background:#fff;
text-align:right;
cursor:pointer;
color:#FE80DF;
margin:5px 0;
float:right;
border-right:2px solid #FE80DF;
border-left:2px solid #FE80DF;
padding:5px;
-moz-border-radius:6px;
-webkit-border-radius:6px;
font:bold 11px sans-serif;
}
.MBT-Buttons:hover{
background:#fff;
font:bold 11px sans-serif;
color:#CC0099;
border-right:2px solid #CC0099;
border-left:2px solid #CC0099;
}
.MBT-Buttons a {
color:#FE80DF;
text-decoration:none;
}

.MBT-Buttons a:hover {
color:#CC0099;
text-decoration:none;
}

Button#5:

CSS buttons

/*------------- Brown top Bottom----------*/
.MBT-Buttons{
background:#fff;
text-align:right;
cursor:pointer;
color:#B26B00;
margin:5px 0;
float:right;
border-top:2px solid #ddd;
border-bottom:2px solid #ddd;
padding:5px;
-moz-border-radius:6px;
-webkit-border-radius:6px;
font:bold 11px sans-serif;
}
.MBT-Buttons:hover{
background:#fff;
font:bold 11px sans-serif;
color:#B26B00;
border-top:2px solid #B26B00;
border-bottom:2px solid #B26B00;
}
.MBT-Buttons a {
color:#B26B00;
text-decoration:none;
}

.MBT-Buttons a:hover {
color:#B26B00;
text-decoration:none;
}

Button#6:

Buttons with CSS

/*-------------- Blue Blank-----------------*/

.MBT-Buttons{
background:#0080ff;
text-align:right;
cursor:pointer;
color:#Fff;
margin:5px 0;
float:right;
border:2px solid #ddd;
padding:5px;
-moz-border-radius:6px;
-webkit-border-radius:6px;
font:bold 11px sans-serif;
}
.MBT-Buttons:hover{
background:#FFf;
font:bold 11px sans-serif;
color:#0080ff;
border:3px dotted #ddd;
}
.MBT-Buttons a {
color:#fff;
text-decoration:none;
}

.MBT-Buttons a:hover {
color:#0080ff;
text-decoration:none;
}

Button#7:

Buttons with CSS

/*------------- Red + Dark Red------------*/

.MBT-Buttons{
background:#fffff;
text-align:right;
cursor:pointer;
color:#FE8080;
margin:5px 0;
float:right;
border:2px solid #FE8080;
padding:5px;
-moz-border-radius:6px;
-webkit-border-radius:6px;
font:bold 11px sans-serif;
}
.MBT-Buttons:hover{
background:#FFf;
font:bold 12px sans-serif;
color:#FF0000;
border:2px solid #FF0000;
}
.MBT-Buttons a {
color:#FE8080;
text-decoration:none;
}

.MBT-Buttons a:hover {
color:#FF0000;
text-decoration:none;
}

Button#8:

Buttons with CSS

/*------------ White + Green -----------*/

.MBT-Buttons{
background:#fffff;
text-align:right;
cursor:pointer;
color:#008000;
margin:5px 0;
float:right;
border:2px solid #ddd;
padding:5px;
-moz-border-radius:6px;
-webkit-border-radius:6px;
font:bold 11px sans-serif;
}
.MBT-Buttons:hover{
background:#008000;
font:bold 11px sans-serif;
color:#fff;
border:2px solid #ddd;
}
.MBT-Buttons a {
color:#008000;
text-decoration:none;
}

.MBT-Buttons a:hover {
color:#fff;
text-decoration:none;
}

Button#9:

Buttons with CSS

/*---------- Black --------------*/
.MBT-Buttons{
background:#000800;
text-align:right;
cursor:pointer;
color:#fff;
margin:5px 0;
float:right;
border:2px solid #ddd;
padding:5px;
-moz-border-radius:6px;
-webkit-border-radius:6px;
font:bold 11px sans-serif;
}
.MBT-Buttons:hover{
background:#fff;
font:bold 11px sans-serif;
color:#000800;
border:2px solid #000800;
}
.MBT-Buttons a {
color:#fff;
text-decoration:none;
}

.MBT-Buttons a:hover {
color:#000800;
text-decoration:none;
}

Button#10:

Buttons with CSS

/*----------Orange One 1 ----------------*/

.MBT-Buttons {
background:#EB7F17;
text-align:right;
cursor:pointer;
color:#fff;
margin:5px 0;
float:right;
border:none;
padding:5px;
-moz-border-radius:6px;
-webkit-border-radius:6px;
font:bold 11px sans-serif;
}
.MBT-Buttons:hover{
background:#FFB93C;
}
.MBT-Buttons a {
color:#fff;
text-decoration:none;
}

.MBT-Buttons a:hover {
color:#fff;
text-decoration:none;
}

Source: http://www.mybloggertricks.com/2011/07/10-ways-to-create-buttons-with-css.html

Comic Panda : YouTube's New Layout Look in 2011!

What Features did You Observe?

As far as I observed these were the new changes made so far. If you think I have missed sharing an important new layout change then feel free to share with all of us. To test all new YouTube adventures then visit [a href="http://www.youtube.com/testtube" target="_blank"]TestTube[/a] Now!

Source: http://www.mybloggertricks.com/2011/07/comic-panda-youtube-new-layout-look-in.html

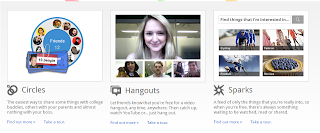
What is Google Plus Project? Is it a Threat To Facebook?


Hangouts


Hangouts feature is more like the video chatting thing where you can start a hangout with your particular circle. Its more like a video conference. This is thought to be the biggest threat to Facebook after Circles and Facebook didn't stayed back.
We all know Facebook and its friendly relationships with Microsoft and both the companies and jointly made a partnership over Skype and now Facebook would feature video calling too.


Can Google+ Dominate Facebook's Traffic and Audience?

With all these features, Google is trying to make this one of their best social networking moves ever and looks like they would be pretty successful too. Some expect that the biggest migration in history from Facebook to Google+ is yet to occur and everyone will be alive to witness it.
Comment below about this race that has started between Google and Facebook. I personally believe that Google plus one would give a hard time to Facebook setup until Facebook reconsiders their privacy issues.


This was a Guest Post by Hassam Ahmad Awan From [a href="http://bloggingehow.blogspot.com" rel="nofollow" target="_blank"]Bloggingehow[/a]
Source: http://www.mybloggertricks.com/2011/07/what-is-google-plus-project-is-it.html

How To Join Google Plus & Send Invites In Europe?

5 ways To Join Google+ In European Countries

That's it! Within next 48 hours your friends will receive invitation after which they can jump into your Circle to share the adventure. Have Fun! :>

Source: http://www.mybloggertricks.com/2011/07/how-to-join-google-plus-send-invites-in.html
 
Play : Agame | Y8 Games | Y3 Games
Copyright © 2011. Blogger Tips And Tricks 2012 - All Rights Reserved

Proudly powered by Blogger