Showing posts with label Webmaster Tools. Show all posts

Releasing Facebook Template For Custom Tabs

       5.   Switch to the Source mode as indicated by the blue arrow in the image above. Paste the Code you copied from the notepad inside it.

       6.  Now switch to Editor and make the necessary editing easiliy like you normally do in any html editor.

       7.  After you are done with editing, hit the save settings button and then click your Tab to see it in action!

save settings

Final View:

Facebook template design

Copyright

All rights are strictly reserved by MBT Blog. You can not redistribute the templates without our permission. If you wish to share the tutorial or code with your readers then you may first contact us.

Premier Services

We also design templates and Icons at premier level. If you want a completely unique and new design for your business website then you may [a href="http://www.mybloggertricks.com/2009/03/contact-me.html" target="_blank"]contact us[/a] for details.

Source: http://www.mybloggertricks.com/2011/07/releasing-facebook-template-for-custom.html

Create a Contact Form With File Upload Option

Keep your form simple with some important fields only like Name, Website URL, Email, Age, Country, Subject and Message. The form builder looks like this,

form builder

The form builder has blue buttons at left and display at right. When you click a button on left the effect is displayed on right. Now kindly follow as I instruct for keeping things simple and for creating a simple but informative contact form.

Follow this order:

  1. Click the Name button in advance section
  2. Next click Web site
  3. Next Email
  4. Next Hidden Field. Now click the hidden field section on the right and rename it as Age
  5. Next click Hidden Filed again and rename it as Country
  6. Next click File Upload  (Optional you can leave this option if you don't want users to send you files via email)
  7. Now From the Basic section click Paragraph Text & click it to rename it as Message
  8. To make a specific form option a must to fill then simply click that row and select required as shown below

edit form fileds


Your contact form now must look something like this:

contact-form

     9.   Click the Form Title and add some message there for your visitors. For example you can write :

We Love To Hear From You

Feel free to ask for any help. We will catch you back as soon as time allows

If you wish you can remove the form title by unchecking the box and deleting the description text. See below

contact form title

     10.    Now on the form settings choose Redirect URL and insert the page link of your thank you page. A thank you page is something [a href="http://www.mybloggertricks.com/2008/04/message-received-notifier.html" rel="nofollow" target="_blank"]like this[/a]

redirect contact form

You may create a separate post for this by giving it an old publishing date. Blogger users can create a Page instead of Post.    

11.  Now replace send Email by submit and align it to right as shown below:

submit button

  12.  Next click the Captcha Code at the bottom and select the none option from the left section as shown below:

remove captcha-code

This security code is often added to prevent spam but I have never used this security code and I honestly have received not even a single spam till today. Just remove it to make the contact form even more neater.

13.   Finally hit the Save Form Button and a window will appear as shown below:

save form

14.   Choose the second option and add a recipient email ID. Choose an ID that you often use so that whenever someone leave a message you may receive it straight in your inbox. You can also add more than one recipients. See below:

add recipient

Leave other options as default. Hit Save! Now choose the third option.

save contact form

15.   In Form manager Click Code

contact-form-code

16.  Choose the HTML Only option and copy the code. Make sure to enter the URL of the page where you want to embed the contact form. See below

copy code

It is therefore better that first you create a Page on Blogger and publish it. Fetch its URL and paste it in the blank "Enter URL where form is embedded"

Now simply copy the code and paste it in your contact page. To delete the emailmeform logo from the contact form find and delete a similar code like the one below from the code you just copied.

  <div><font face="Verdana" size="2" color="#000000">Powered by</font><span style="position: relative; padding-left: 3px; bottom: -5px;"><img src=
  "http://www.emailmeform.com/builder/images/footer-logo.png" /></span><font face="Verdana" size="2" color="#000000">EMF</font> <a style="text-decoration:none;" href="http://www.emailmeform.com/"
  target="_blank"><font face="Verdana" size="2" color="#000000">Forms Online</font></a>
</div><a style="line-height:20px;font-size:70%;text-decoration:none;" href="http://www.emailmeform.com/report-abuse.html?http://www.emailmeform.com/builder/form/r99G329aiV6k6" target=
"_blank"><font face="Verdana" size="2" color="#000000">Report Abuse</font></a>

Publish the page and bingo you are done! I know the steps are lengthy but the result is indeed worth it. In my coming posts you will learn how to completely customize this contact form with your own colors and styles. See our contact form as an example. I just hope you may have found today's tutorial helpful. If you need any help please do not hesitate to post your question. Have fun buddies! :)

Note: Paste the Contact Form code in Edit HTML mode only and hit the publish button on blogger Post Editor. Do not toggle to compose mode because this will collapse the form.

You may also find our previous tutorial helpful:

  • [a href="http://www.mybloggertricks.com/2009/09/releasing-highly-stylized-contact-me.html" target="_blank"]Create Contact Form[/a]
Source: http://www.mybloggertricks.com/2011/07/create-contact-form-with-file-upload.html

PageRank is Not Important Says Google 2011

Unless you have quality content both your PR and Alexa are useless. Because with quality content you get lifetime quality organic Traffic. There are many blogs and websites with PageRank 6.0 in Buysellads directory yet they are not even earning a penny because they spent there great skills on ranking alone and under-estimated the value of good posts, content and shares and as a result ended their careers with hopelessness. My short personal experience says that if there is anything that matters more is Traffic. Writing on things that attract people is what I call blogging.

Below is a video by Google Software Engineer matt cutts where he is answering a question on Why aren't the Google Toolbar PageRank values updated more often? In the same video you will find the answer where he confirms that content is more important than PageRank.

Source: http://www.mybloggertricks.com/2011/07/pagerank-is-not-important-says-google.html

Add Cool Floating Feedback Buttons in Blogger

FEEDBACK-BUTTONSHere is yet another PNG set for Feedback buttons which can be added in a similar method as we did for the previous [a href="http://www.mybloggertricks.com/2011/06/floating-feedback-buttons-set-for-blogs.html" target="_blank"]Feedback Buttons[/a] set. This time we will mouse hover effect to these buttons. The buttons will change color on mouse hover. You can do that using a simple code as shared below,
[a name='more'][/a]
[a href="#download" rel="nofollow"]Download[/a]

Add Floating Feedback Buttons With Mouse Hover in Blogger

  1. Go To Blogger > Design > Page Elements
  2. Select HTML/JavaScript widget
  3. Paste the following code inside it,


<a style="display:scroll;position:fixed;bottom:10px;left:0px;" href="URL OF CONTACT PAGE" title="Feedback Please, Can't go further without your help"><img onmouseover="this.src='IMAGE LINK 2'" src="IMAGE LINK 1" onmouseout="this.src='IMAGE LINK 1'"/></a>

Make these changes:

  • Replace URL OF CONTACT PAGE with the Link of your contact page
  • Replace IMAGE LINK 1 with the URL of image in active mode
  • Replace IMAGE LINK 2 with the URL of image which appears on mouse hover
  • Change left to right if you want the button to appear at right side of your page

     4. Save your widget and you are done!

[a name="download"]Download[/a]

The rules are old. Kindly subscribe by submitting your Email ID below,


name="loc" type="hidden"/>
type="submit"/>

Activate your feeds and post the same Email ID below so that I could send the icons immediately. By subscribing once you get free access to all blogger resources published so far.

Source: http://www.mybloggertricks.com/2011/06/add-cool-floating-feedback-buttons-in.html

Add Syntax Highlighter To BlogSpot Blogs


     5.   Save your template and you are done!

How it works?

Whenever you wish to share a code of any type with your readers, simply enclose the code between these lines,

<pre class="brush:css, brush:html, brush:js, brush:php, brush:sql, brush:python">

ADD THE PARSED CODE HERE

</pre>

I have combined all brushes into one making it easier for newbie to implement the tutorial.

Note: Do not add the code directly because you will get error in Blogger Editor, instead first parse the code using the Parser Tool provided by us.

Replace ADD THE PARSED CODE HERE with the parsed/encoded code and publish your post to the see the magic.

That's it! Hope you like it. I will publish different color schemes for Syntax Highlighter in my next posts so make sure you don't miss the update. I also published some block quotes with auto number list and if you wish you can use them instead by reading this tutorial,

  • [a title="http://www.mybloggertricks.com/2009/11/blockquote-with-auto-number-list.html" href="http://www.mybloggertricks.com/2009/11/blockquote-with-auto-number-list.html" target="_blank"]Blockquote with Auto Number List[/a]
Source: http://www.mybloggertricks.com/2011/06/add-syntax-highlighter-to-blogspot.html

+1 Report Stats added to Google Webmaster Tools & Analytics

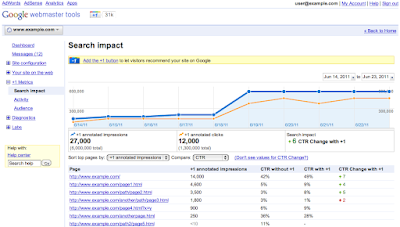
+1 metrics With the successful invention of the [a href="http://www.mybloggertricks.com/2011/06/add-google-1-button-to-your-blogger.html" target="_blank"]+1 Button[/a] and the +1 Project, [a href="http://adsense.blogspot.com/2011/06/1-reporting-in-google-webmaster-tools.html" target="_blank"]Google released[/a] the +1 stats reports in Google Webmaster Tools. This new integration was made today.The +1 reports will tell web owners and bloggers how much traffic value the button is bringing to their site. You can now track the number of times your pages have been +1 'd by your visitors on your web pages as well as on your Adword Ads or search results. Fortunately you can now also track the performance of other social plugins by using [a href="http://www.google.com/support/analyticshelp/bin/answer.py?answer=1316556&topic=1316551"]Social Plugin Tracking in Google Analytics[/a]. The +1 Metrics menu can now be found on your webmaster account. It contains three important features which are:

[a name='more'][/a]

1. Search Impact Report

This tells you how your Clickthrough rate changes when people recommend your blog or webpage more and more. With +1 recommendations your organic search traffic can surely take a positive turn but to measure how much it helped you, [a href="http://www.google.com/support/webmasters/bin/answer.py?answer=1140189&topic=1140191&utm_source=webmaster&utm_medium=blog&utm_campaign=announcement" target="_blank"]Search impact[/a] is the tool you need.

2. Activity Report

In simple words [a href="http://www.google.com/support/webmasters/bin/answer.py?hl=en&answer=1140192&utm_source=gablog&utm_campaign=socialTracking&utm_medium=blog" target="_blank"]activity report[/a] shows you how many times your web pages have been +1’d, from buttons both on your site and on other pages. This will let you know how much your content is being recommended. It comes with two options i.e. New +1's and All +1's. Pretty obvious terms.

[a href="https://blogger.googleusercontent.com/img/b/R29vZ2xl/AVvXsEhsffw87OXS6lIniary-avKIzly_mHCMBJszM3u-Sy6wV8VYDWQBINVGgrQOIvTzaAUeaPLwTRo-Y0TI0ezeAZATAQjK46gklNoQ9nxgbmR_npH0G-0WmxEtjp6SCnDmO37vIfe4sKOlkE/s1600-h/image%25255B4%25255D.png"]+1 activity report[/a]

3. Audience Report

[a href="https://blogger.googleusercontent.com/img/b/R29vZ2xl/AVvXsEi_GVJNhWjjowvR2ol8d604xB727K3CcUGfkcUdqEB5-prz4aS6mOJ6lKuQ4H3gOy47iJt4P4ZtEY44RiqgOc1BsjReL7bHYj4PjxctdYo5IMxoyfkkl2_721YMRaupNfCtSWGQtiqtRFc/s1600-h/image%25255B9%25255D.png"]+1 audience report[/a]

[a href="http://www.google.com/support/webmasters/bin/answer.py?answer=1198127&topic=1140191&utm_source=webmaster&utm_medium=blog&utm_campaign=announcement" target="_blank"]Audience Report[/a] options shows the total number of unique users who +1'd  your pages along with aggregate geographic and demographic information about the Google users who’ve +1’d your pages.


Social Plugin Tracking in Google Analytics

This new feature is added in your [a href="http://analytics.google.com" target="_blank"]analytics[/a] account to let you know the performance of other social plugin recommendations. This according to me is even bigger achievement of Google compared to +1 project. Social networks are the best tool for traffic and keeping an eye on how well these networks are playing for your website traffic should be the crucial part of your Traffic campaign. Plugin tracking for all social share buttons on your blogs or webpages is done using some JavaScript. I will mention in detail on how you can set up the tracking for other social plugins  for your websites in my coming posts.

This social engagement reporting tool comes with three options which are explained by Google as:

The Social Engagement report lets you see how site behavior changes for visits that include clicks on +1 buttons or other social actions. This allows you to determine, for example, whether people who +1 your pages during a visit are likely to spend more time on your site than people who don’t.

The Social Actions report lets you track the number of social actions (+1 clicks, Tweets, etc) taken on your site, all in one place.

The Social Pages report allows you to compare the pages on your site to see which are driving the highest the number of social actions.


What do you think?

Let me know what are your views on this latest development and do you think it will bring something fruitful to you in person. Any views will highly be appreciated.

Source: http://www.mybloggertricks.com/2011/06/1-report-stats-added-to-google.html

Password Protect Widgets In Blogger Blogs!

You can hide images, text, media, whatever you want. The content on your sidebar can be a hidden message for blog authors, contributors or special visitors. I hope you make good use of this new technique. Have fun!

Source: http://www.mybloggertricks.com/2011/06/password-protect-widgets-in-blogger.html

Make Mobile Version Of Your Blogger Blogs For Mobile Devices - Surprise!


How To Show the Mobile Version Of Your Blog?

Simply follow these steps,

  1. Go To Blogger > Settings > Email & Mobile Tab
  2. Click on the option that says "Yes, on mobile devices, show the mobile version of my template"

Picture 11

    3.   Click the "Save Settings" button at the bottom and you are done!

Now Click the "Mobile Preview" button to see how your blogger blog will show up in an Iphone. Enjoy this great functionality and keep loving Blogger! :>

Source: http://www.mybloggertricks.com/2011/06/make-mobile-version-of-your-blogger.html

Surprise! MBT Developed Its First Facebook HTML IFrame WebPage

Facebook Iframe TabAfter hours of trial and error and coding and coding and just coding, Alhamdulillah I succeeded in crafting and developing MBT's first Fans Welcome Page on Facebook. This was indeed one of the most enjoying designing thing I came across so far. Designing blogger templates, widgets, icons, buttons is more like a hobby now but taking a step further and branding a service and product on Facebook was a complete new experience. The Facebook application used in building this Welcome Page is called [a href="http://www.facebook.com/LouiseSteinerOnline#!/apps/application.php?id=190322544333196" target="_blank"]Static HTML IFrame Tabs[/a].  My coming tutorials on this are close to never shared before on any blog, forum or even the Facebook developers page and most often this is done at premium levels but[a name='more'][/a] you will be really excited to implement it to your blogs once we publish the series Guide for free. Together will we make the blogging platform even more appealing and worth exploring. Your motivation has helped me a lot in taking this step and I will need your valuable support always. I am really excited to share this unique "Facebook Welcome Page"  of MBT. So let's have a look of it:

PS: Please view it using any browser but not IE. The Page is Compatible with Mozilla, Chrome, Safari and even slightly with IE8+


[a rel="nofollow" href="https://www.facebook.com/pages/My-Blogger-Tricks/147104632016744" target="_blank"]MBT Fans Welcome Page[/a]


It's 4.29 AM of night, 14th June 2011 and I am really tired to share the tutorial at this moment. I will publish series of posts on this topic with free and unique Code designs and will make sure that the coding is made as easy in implementation as possible. I would be more happy viewing your Welcome Pages with different colors and tastes. Peace and blessings. :)

Need your Feedback on this!

I will highly appreciate your precious feedback on this latest finding. Your comments mean a lot. If you have any idea you can share before we publish the tutorials then please share it openly with all of us. I would love to hear how you like it.

Source: http://www.mybloggertricks.com/2011/06/surprise-mbt-developed-its-first.html

How to add Blogger Poll Widget To Posts?

Interesting? Now lets learn how to do that.

Copy The Poll Widget Code From your Source File

  1. Visit your Blog and press Ctrl + U
  2. Next press Ctrl + F and search for this,

http://www.google.com/reviews/polls

   3.   You will find a code that starts with iframe and ends with iframe, something like this,

<iframe allowtransparency='true' frameborder='0' height='180' name='poll-widget-1533663100889025859' src='http://www.google.com/reviews/polls/ display/-1533663100889025859/blogger_template/run_app?hideq=true&purl=http%3A%2F%2F www.mybloggertricks.com%2F' style='border:none; width:100%;'></iframe>


    4.   Simply copy that code and paste it wherever you want in your blog post!

    5.   That's it!

Once you have copied the code from your blog's source file then you can happily delete the poll widget from the sidebar by going to Blogger > Design > Page Elements

Hope you find it useful and easy. If you faced any difficulty just shoot me a comment. Peace out brothers! =)

Source: http://www.mybloggertricks.com/2011/06/how-to-add-blogger-poll-widget-to-posts.html

Free Blogging Apps for iPhone / iPod Touch

[a href="https://blogger.googleusercontent.com/img/b/R29vZ2xl/AVvXsEiA3k1TDzFlVy38TEihXjw5smPpmQ7F-fH3W1UQx1tcObcFWKPufZT0-kwExZnAFVtv6vewFjBEql1bOq5YafQZY0ZJBMDi0QocXJ3Gn3TqLoDzvXM5nVkeaGlg5oWoL8dbbqM8MOJAu9o/s1600/penmyblog4.jpg"][/a]

[a href="https://blogger.googleusercontent.com/img/b/R29vZ2xl/AVvXsEjvrLrZ43iSrUfiSgRZLoEdYW2Vw2snykiLzgp5a6oO-YQedx8elNCd8oHHdsr528CoG1A886vRRoEyePWncelewX2U9NAmLAyEWpVrphEW6Q0U7CSaiEF1rp2E7JPd7Ph9ks0gE6TZPOI/s1600/penmyblog.jpg"]pen my blog[/a][a href="https://blogger.googleusercontent.com/img/b/R29vZ2xl/AVvXsEiA3k1TDzFlVy38TEihXjw5smPpmQ7F-fH3W1UQx1tcObcFWKPufZT0-kwExZnAFVtv6vewFjBEql1bOq5YafQZY0ZJBMDi0QocXJ3Gn3TqLoDzvXM5nVkeaGlg5oWoL8dbbqM8MOJAu9o/s1600/penmyblog4.jpg"]pen my blog[/a]


[a href="https://blogger.googleusercontent.com/img/b/R29vZ2xl/AVvXsEidqUUABZK6m09U9FOKsKWXNc6pwlf53rDDubbtu4wNYR3bC_Y5AMAAwfbNFIhErV6dswgMlUP-EmuTWmm9jguFe3QpTESBTCsLd82A-VA05c4gEVWkOVH7VLsQuvcTyJLkv3Q47VpVz3o/s1600/penmyblog2.jpg"]blogging app[/a][a href="https://blogger.googleusercontent.com/img/b/R29vZ2xl/AVvXsEhuhOmcoP3m_-wB_V6Ei-ssZkqhSLNAHAqVaTj6RupRn_-SQHg3HHfB2YzWohrn0EKi57oe1KjUTOQSQq0LO-kP7J0yiJ_hOZzvtTtCF3u5FdhEWjJb3E70iMdLxDEH9ESoi5SrQyOGZfA/s1600/penmyblog3.jpg"]iphone blogging app[/a]
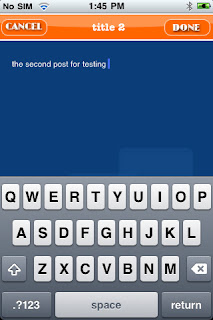
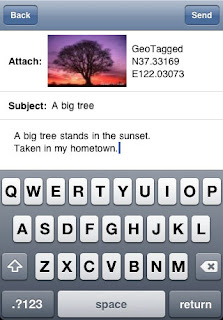
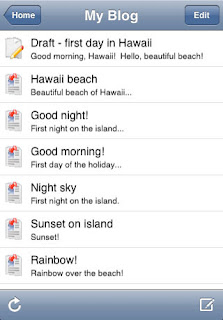
A really simple and user friendly app i must say. I have used it for couple of days. It works but its not the best. You can view your posts, write a new one easily. But the big draw back is that you cant see images within your post. Thats simply awful. Also the layout doesn't have much to offer. It would be better if there was some option to view the stats, revenue and stuff. 
But still in the end its a free app. So what we want more.

Blog Write (Lite):

Requirements: Compatible with iPhone, iPod touch, and iPad. Requires iOS 2.2 or later
This app is my personnel favorite among these two. At least you get to view the images in your post. Also it supports other blogging platforms like WordPress, self hosted WordPress.

[a href="https://blogger.googleusercontent.com/img/b/R29vZ2xl/AVvXsEgYQKdYY4ZvY7tDj8IbCHfi2yoPkyid-KX6RGpY_mo07b5DDNoQ5ibRGA7zj8XFJcQGEhhx96p6OQR2CkHYmZbp4t7LUKBsxnSUGgxfPdV9uiwZ_XtuGl_1EkCWCt92J1ZZxDNzGdiPWyY/s1600/blogwriter.jpg"]blog write blogging app[/a][a href="https://blogger.googleusercontent.com/img/b/R29vZ2xl/AVvXsEiYbTRs2YXc_teZjS3LIexK8ZlJyvuG0p2LjuXm45xMm6KGnfGDz0XPBcs8swRF6qDMYFQarsqy-3NrifIdHCTkdqi3Qs8pjqNcX6zMyBgHtfsu5XbNT7UlZf48_zygTDaz6rRrKwgh72w/s1600/blogwriter2.jpg"]blog write feeds[/a]
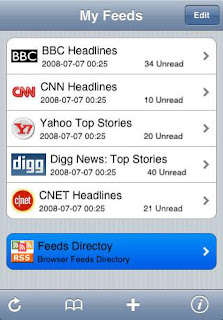
[a href="https://blogger.googleusercontent.com/img/b/R29vZ2xl/AVvXsEjxvvbsbDmuxeXG1Cc5pmiNKwUvSjF3cC_HeAT0dEBwhIwyPotF8OaUYHu69sjmEVIUSI6q738lJIqnGvcTnn4NBovkwbRGHLdYh-vE2q5Xe3W5YF16SbwL-UAQmFzIJCKRo-JoGklfyp0/s1600/blogwriter3.jpg"]blog write Editor[/a][a href="https://blogger.googleusercontent.com/img/b/R29vZ2xl/AVvXsEgEomfJldW8OEtx5sdM2RXo4Vp_4bdcUlvhYkJj4ErqhyphenhyphenRhaYPebpsAjpXQkdguUYmBNwuwbjkF4fKtjI0WItlorMS2V2g8QmtsPAVB4zz0uEPJgGoXaq1cs3nmbjp9eIqwm4Y3zS0uP5Q/s1600/blogwriter5.jpg"]blog write Image[/a]

[a href="https://blogger.googleusercontent.com/img/b/R29vZ2xl/AVvXsEiqNE4bgIN5pcw_K3mMUCU9WUqMdkpUh7gpgE3r5g_9fcaSgd0JoCnfQCoDAWAd3cxiXvl6ld_T3sxYfSqsb7-u6SCYPz2MlWVpdEjMVc-isLNNGaA2bJldeQRNcHNWGUWFquX-XhM8Kbc/s1600/blogwriter7.jpg"]blog write post list[/a]

Final Judgement :

"Blog Writer" is definitely my hero as it has low system requirements and offers more then "Blog My Pen". Now you can work on your blog more than before. So try both of these apps and start using which best suites you. Until then, me going to play with those apps :)

  Hassam Ahmad Awan


About the Guest Author:

Hassam is a young A Level Student who loves to learn and share tech related stuff. He has an ambition to become a Software Engineer. He is a passionate blog author and publishes regular tutorials to newbie bloggers at [a href="http://bloggingehow.blogspot.com" target="_blank"]BLoggingeHow[/a].

You can always keep in touch with him at [a href="http://www.facebook.com/pages/BLoggingeHow/126203964129170" target="_blank"]@Facebook[/a]

Source: http://www.mybloggertricks.com/2011/06/free-blogging-apps-for-iphone-ipod.html

Macbook Pro - Every Bloggers Dream

Connectivity

Other Basic Features


Cost

In short MacBook Pro is a must for every blogger to enjoy the best blogging experience anywhere, anytime. You can get it at $1199 from [a href="http://store.apple.com/us/browse/home/shop_mac/family/macbook_pro?aid=AIC-WWW-NAUS-K2-CONFIGURE-MACBOOKPRO-15-INCH&cp=CONFIGURE-MACBOOKPRO-15-INCH" rel="nofollow" target="_blank"]here[/a].
 6074322513670103934Fahad Uddin


About the Guest Author:
Fahad is an Undergraduate Student, pursuing his B.E Degree in Computer and Information System Engineering. He is an excellent programmer and part time blogger. He Writes at [a rel="nofollow" href="http://mycsnippets.blogspot.com/" target="_blank"]My C Snippets[/a]. You can always contact him at [a rel="nofollow" href="http://www.facebook.com/fahd92" target="_blank"]Facebook[/a]

Source: http://www.mybloggertricks.com/2011/06/macbook-pro-every-bloggers-dream.html

700+ Smashing Web2.0 Icons For Web Designing- Free!

web2-icon-setFree Icons, buttons or any blogger goody is something that is always welcomed by all. I am sharing some of my Freeware Icon collection that I have collected over the recent years for my designing projects. This web2.0 icon set contains everything you may need, from blog icons, forums, iphone, social media networks till RSS icons. All packed in one jumbo magic set! To get a free png copy of the this great collection, kindly submit your Email ID below in order to become a valuable MBT reader and avail tons of such resources for free.

[a name='more'][/a]


name="loc" type="hidden"/>
type="submit"/>

After subscribing, activate your feeds and then post your Email ID with which you subscribed in the [a href="#comments"]comment form below[/a], so that I could send you the banners immediately

Source: http://www.mybloggertricks.com/2011/06/700-smashing-web20-icons-for-web.html

Compress CSS and HTML To Speed Up Site Load Time Part 1

CSS Compression:

Part 2

To read the remaining part of the tutorial guide kindly click the link below,

  • [a href="http://www.mybloggertricks.com/2011/06/compress-images-and-javascript-to.html" target="_blank"]Compress Images and JavaScript To Speedup Site Load Time  Part 2[/a]

If you find any other good/better services, or have any questions or concerns, please leave a [a href="#comments"]comment below[/a]! That’s it for part 1! I hope you have fun improving the load time and speed of your site or blog(s)!  :>

Anims


About the Guest Author:

Anims is freelance web designer and enjoys playing around with and learning coding in his free time. He likes to write about Web Technologies such as HTML, CSS and SEO.

Source: http://www.mybloggertricks.com/2011/06/compress-css-and-html-to-reduce-site.html

Compress Images and JavaScript To Speed Up Site Load Time Part 2

Image Compression


My next step is to compress my images. Save all of your blog’s images into one folder, and go to [a href="http://www.smushit.com/ysmush.it/" target="_blank"]Smush it.[/a] This is an image compressing tool made by Yahoo. Upload all of your images, where they will be compressed, and download them in a zipped file. You can then re-upload them to your blog. Both techniques shown so far will decrease your page size and loading time by at least 30%.


JavaScript Compression


Your next step is to compress all of your JavaScript. Please go to [a href="http://jscompress.com/" target="_blank"]JS Compress[/a]. Upload your JavaScript, have it compressed, and re-upload it to your webpage.


Conclusion:


We have covered all of the major aspects of reducing page size. There are more minute things however, which are covered in the web apps and MBT post listed below.

  • [a href="http://www.mybloggertricks.com/2009/11/11-useful-tips-to-reduce-your-blog-load.html" target="_blank"]12 tips to reduce your blog's loading time.[/a]


If you really want to take it to the next step, then you can download [a href="http://developer.yahoo.com/yslow/" target="_blank"]Y Slow[/a], which is an app by yahoo, which analyses how speed optimized your webpage is, and tells you how to reduce your loading time.
Another website to check your loading speed is [a href="http://www.pingdom.com/" target="_blank"]Pingdom Tools[/a], or just using Google Webmaster Tools.

If you find any other good/better services, or have any questions or concerns, please leave a [a href="#comments"]comment below[/a]! Hope this little help proves helpful to must of you. :>

Anims


About the Guest Author:

Anims is freelance web designer and enjoys playing around with and learning coding in his free time. He likes to write about Web Technologies such as HTML, CSS and SEO.

Source: http://www.mybloggertricks.com/2011/06/compress-images-and-javascript-to.html

How To Integrate AdSense In Google Custom Search Engine?

5) Hit the Submit button and you are done!

6) Log into your [a href="http://adsense.com" target="_blank"]Adsense[/a] Account and simply click the link that may appear at the top of your dashboard which will ask you whether or not you wish to let the Custom Search engine to access your AdSense Ads. Simply click it and enjoy the happy new earning! =)

Source: http://www.mybloggertricks.com/2011/05/how-to-integrate-adsense-in-google.html

Top Ten Mozilla Add-Ons for Web Designers & Developers

2. CSS Usage

4. Seo Quake

6. HTML Validator

8. Web Developer

9.ColorZilla

FireFTP is a free, secure, cross-platform FTP/SFTP client for Firefox which provides easy and intuitive access to FTP/SFTP servers. Along with transferring your files quickly and efficiently, FireFTP also includes more advanced features such as: directory comparison, syncing directories while navigating, SFTP, SSL encryption, search/filtering, integrity checks, remote editing, drag & drop, file hashing, and much more…  [a href="https://addons.mozilla.org/en-US/firefox/addon/fireftp/" target="_blank"]Download The Add-on[/a]


Umair let me take the opportunity of commenting first on one of your extremely valuable post. As a web designer my self, I had never looked into the importance of these tools as much as you made it looked so simple and useful. I often wasted a lot of time troubleshooting browser compatibility issues linked to codes in the templates but never realized that how easily these errors could be solved using these brilliant tools. I personally liked it a lot and your post forced me to give you a thumbs up! Great work.

  Umair Ahmed Khan


About the Guest Author:

Umair is an Undergraduate Student, pursuing his B.E Degree in Computer and Information System Engineering. He has a desire to develop IPhone and Android applications in future. You can contact him always at his [a rel="nofollow" href="http://www.facebook.com/umairkhan.cis"]Facebook[/a]

Source: http://www.mybloggertricks.com/2011/05/top-ten-mozilla-add-ons-for-web.html

How To Make a Mobile Version Of a Blog?

UPDATE:- Blogger has recently Added the Mobile Version Support. [a href="http://www.mybloggertricks.com/2011/06/make-mobile-version-of-your-blogger.html" target="_blank"]Make a mobile version of your blogger blogs now by clicking this link.[/a]


mobilize-blogger blogPeople are just now beginning to understand that there is another option for monetizing their websites. There is the mobile option that they are probably lagging behind in.

Consider for a moment just how many people have cell phones today. Smart phones, IPhones, Tablets and such are all taking our communications to the next level. People use these devices everyday for simple things like communication and for a variety of other things like finding information that they need via the Internet. The funny thing is that they say that by the year 2012, there are going to be more phone connected to the Internet than actual computers. Think about that for a minute. Right now there is on average one phone per person per household in comparison to only one computer per household.

[a name='more'][/a]


[a href="http://gmbhnews.com/view/MyBloggerTricks.html"]Mobile Version Of MY Blogger Tricks [/a]

It is said that Google activates over 350,000 Android devices each day. That is not surprising considering most people use their phones for much more than just phone calls these days. Now that you are starting to realize how many people there are searching for something on the Internet via their cell phones, you are probably beginning to understand why a mobile website is so important. Normal websites just do not display very well on a hand held device. Besides, what good is having a website that most devices can not access?

A place like the [a href="http://gmbhnews.com/make-mobile-site/" target="_blank"]Mobile Site Maker[/a] is invaluable because they can help you with your [a href="http://www.gmbhnews.com" rel="nofollow" target="_blank"]mobile website[/a], especially since you probably have no idea where to start. In fact, getting a mobile website up and running is as simple as it gets. It does not matter what sort of mobile website you need. GMBHNews.net can help you realize your mobile website plans in very little time at all, no matter how big or small it may be. They will also help you monetize that site with Google Adsense or other advertising. They will use their own [a href="http://gmbhnews.com" rel="nofollow" target="_blank"]popular mobile site[/a] to launch yours as well thereby driving traffic to it in no time! With a 30-day free trial and only $9 per month for the standard plan (that's less than $ 0.50 US per Day) to create and monetize your mobile site, you can't go wrong! Other [a href="http://mobify.me/features-pricing/" rel="nofollow" target="_blank"]sites charge an arm and a leg[/a] for lesser services! You simply can not beat their prices and services!

They also offer a variety of different service plans for those customer that wish to get a little more. Remember, it does not matter how small or how large your operation is. Once your mobile site is up and running you can just let it go on autopilot and make money for you even while you sleep!

The sample Video below will further help you better understand how its done.


About the Guest Author:

Gmbhnews Mobile Service is a mobile site creation and monetization service that makes it very easy for publishers to create and monetize mobile versions of their websites in less than 60 seconds. Christina Clark Co-founder of [a href="http://www.gmbhnews.com" rel="nofollow" target="_blank"]www.gmbhnews.com[/a] mobile portal and [a href="http://www.gmbhnews.net" rel="nofollow" target="_blank"]www.gmbhnews.net[/a] mobile services Blogger at [a href="http://www.blog.gmbhnews.com" rel="nofollow" target="_blank"]http://www.blog.gmbhnews.com[/a]

Source: http://www.mybloggertricks.com/2011/05/how-to-make-mobile-version-of-blog.html

How To Use PayPal In Iran, Egypt and Pakistan?

[a href="http://www.blogger.com/profile/13597329800723396260" target="_blank"]Bhavesh[/a] from [a title="http://www.plentyofebooks.net/" href="http://www.plentyofebooks.net/" target="_blank"]Plenty of Ebooks[/a] Suggested some new Ways for Indian Users which I have shared below,

" The only solution right now is either use debit/credit cards for online payment or switch to moneybookers or alertpay. The second option doesn't guarantee that your problem is solved forever because as more people switch to other options RBI can impose these rules on moneybookers and alertpay as well in future.
Another solution for payments is using VCC but not a very good idea I think.
As for receiving money is concerned here is an eg. what you can do.
Eg. You are about to receive 1000 USD from someone but the limit is 500 USD. So what you can do is get that 1000 in two transactions of 500 USD each. It doesn't matters how many times in a month you receive 500 USD.
The rules are not fully implemented yet in all accounts. Some are able to send money as they used to do before and some cannot. Its just a matter of time when the rules are fully implemented.
Although I don't see that anything is gonna change in these pathetic rules you can still take a step forward a make a petition on the following site informing RBI how these rules affects you.
Here is the site where you can file your petition:
[a href="http://ieoi.in/"]Internet Entrepreneurs of India's Petition to RBI [/a]"

I also asked him to further explain what VCC is and how widely do people use [a href="http://www.moneybookers.com/app/" target="_blank"]Money bookers[/a] and [a href="https://www.alertpay.com/en/Default.aspx" target="_blank"]alertPay[/a]. To which he answered:

"VCC (Virtual Credit Card) is somewhat like a temporary credit card you can say. It is valid just for just 24 hours. Not all banks provide this service. HDFC Net Safe provides a VCC.
To create a VCC you need to have an actual credit/debit card. After creation you get a different 16 digit no. and CVV no. etc etc. which is not related to your actual credit/debit card. By this you can shop online without worrying because it will expire in 24 hrs. and also you can set a limit of how much to use in that VCC. So VCC is for some one who do not want to pay online regularly or for people who are concerned about the security. For people who pay regularly online then attaching a credit/debit card to paypal is best option so far I think.
And about alert pay and money bookers, I can say that money bookers is now getting popular after this paypal issue. Many people are switching to them because these rules are only imposed on paypal at the moment. But it will take time for online retailers because not all of them uses Money Bookers at the time because paypal was ruling but I guess they will start adding money bookers as an option for payment as well. Again its just a matter of time :)"

How Far Do You think This Solution Sounds For you?

I would highly appreciate any other working solution that you may have practically applied and it worked for you. The solution above is what I personally applied and it worked just fine for me. I just hope it proves useful to most of you. Peace and blessings :>

Source: http://www.mybloggertricks.com/2011/05/how-to-use-paypal-in-iran-egypt-and.html

Use Windows Live Writer & Kick Blogger Editor!


Why Still Blogger Editor?

The Question that comes to my mind is why still Blogger Editor when there exists such a highly developed Editor that does half the work on your part?  From what I have observed is lack of WLW promotion in this respect. Not many tutorials are written on WLW features and therefore newbie bloggers are still un ware of this great magical tool. I will write a comparison Chart of Windows Live Writer VS Blogger Editor 2011 on my next post. Till then I am sure the videos below will help you greatly in better understanding the use of this great blogging software. I honestly can't blog without it. The New Windows Live Writer 2011 has complete Microsoft Office Functions in it.


1)  Getting Started With Windows Live Writer


2) Basic Authoring Of Windows Live Writer


3) Using Pictures, Videos, Maps and Plugins With WLW


4) Publishing a Post and Viewing it Live

Source: http://www.mybloggertricks.com/2011/05/use-windows-live-writer-kick-blogger.html
Older Posts Home
 
Play : Agame | Y8 Games | Y3 Games
Copyright © 2011. Blogger Tips And Tricks 2012 - All Rights Reserved

Proudly powered by Blogger